Wonderful Things Blog Tour!

Here am I, coming up on the last day of Bonnie Christine's wonderful blog hop tour for her new line, "Wonderful Things", for Art Gallery Fabrics. This has been one of my very favorite lines (that's a lie, they are all favorites, but as I can't choose a favorite between Bonnie and my other daughter, Becky, I can't choose a favorite fabric either). I do, however, love the bright colors that she included in this line, stepping slightly away from some of her beloved soft hues we've all come to associate with her style, so evident on her blog.

Wonderful Things Blog Hop Tour

So, for my tour stop I decided to share a favorite wallet pattern with you. I've made more of these sweet little clutches than I can count because they perfectly meet my needs for what I require in a wallet/purse...a place for cards, money, coins, lipstick, a cell phone and more! And I suppose one of the most appealing things about this pattern is that it's so very easy to make!

SewSweetnessWallet.jpg

The Prima Diva Wallet, by Sew Many Creations is not only beautiful, but one of the most functional wallets you'll ever own. The outside can be trimmed with ribbons, (as shown above using Bonnie Christine's ribbons for Renaissance Ribbons) or in any manner you like. I made one of my favorites using Bonnie's canvas for Art Gallery and added no embellishments at all. And you may recall my woven version from this post.

Prima Diva Wallet

Just look at all those pockets! You can't even see the credit card pockets, but they are there, neatly tucked in the center fold.

wallet2.jpg

I love how it falls open

...and stays open! It sits nicely on the checkout counter when I'm shopping. And I love getting all those compliments!


Purchase Bonnie's fabrics at a number of online shops or your local shop, including my former quilt shop, A Stitch in Time. Wonderful Things fabrics, offered in cottons, knits, voiles and canvas, in typical Art Gallery quality, are truly wonderful things!

Yesterday's beautiful post was written by Alexis Wright of My Sweet Sunshine. You can see the recap with the full lineup on Bonnie's blog, Going Home to Roost.

Thanks for visiting my stop on the blog tour! Happy sewing and God bless!

Maxie

Presenting the "Hello, Bear Buck Forest" Quilt Kit!

Quilt kits make our lives easy and let us get straight to the fun of sewing! This project was a long time in the making, but today's the day that I can finally say that the "Hello, Bear Buck Forest" quilt kit is ready! The Buck Forest fabric line, designed by my daughter, Bonnie Christine, is now a basic with Art Gallery Fabrics, but it is originally a print from her "Hello, Bear" fabric line. Prompted by my good friend, Linda, I began to think about using Hello, Bear to make Buck Heads and border it all with a Buck Forest print.

Hello, Bear Buck Forest Quilt

The quilt, which is 76" x 84" includes sixteen (16) pre-fused, die cut buck heads, (ready to apply to the background fabrics!), background, sashing, outer border and binding fabrics!

I used Lite Steam-a-Seam2 as the fusible material for each head. This product is re-positionable and very easy to work with. Although touted as "no-sew" on the package, I recommend stitching around each head after fusing in place. To do this, simply drop your feed dogs and work free-motion style with each block individually, before constructing the entire quilt. I recommend a dark thread in the bobbin and top, and I'm loving this whimsical straight stitch, with about 3 rounds to hold everything securely.

Stitching the edges of Buck Forest Blocks

However, I have to share that I found an even easier way to stitch the Buck Heads in place...on my Handi Quilter long arm machine! I simply loaded the completed quilt top without the batting and backing, put dark thread in the bobbin and top, and stitched away!

Stitch Applique´on the Handi Quilter Long Arm!

I may never look at applique´ the same again! I've stitched applique´ on my long arm in the past, but always when loaded with backing and batting, which results in a lot of stitches on the back side of the quilt. Working with only the top loaded prevents any of the these stitches on the back, and allows me to use dark thread in both the bobbin and the top, regardless of my backing fabric color! (This quilt's backing, by the way, is Art Gallery's billowy cotton voile. Soft.)

For the quilting, I chose a free-motion woodgrain design in Superior Thread's clear Monopoly, allowing me to stitch over the Buck Heads without conflicting with the applique´stitches. Straight lines or simple meandering would also be great with that same thread.

So, go ahead, order my kit (here) and whip up a Buck Forest quilt for your own little woodland adventurer!

PS...Want a little back side view of making a quilt kit?

There were so many details to work out in creating this in kit form, and I began with contacting Custom Pro-Dies to make a die that would allow me to cut each buck head accurately and quickly. That required a letter of permission to the die company from Bonnie Christine before they would even agree to make the die. That's right. Bonnie gave me exclusive rights because I gave birth to her.

Even before the die was ordered the quilt and yardage had to be determined. I work in Electric Quilt, so I downloaded Bonnie's fabrics into the program so that I could use the actual fabrics I wanted for the quilt. As soon as the die arrived I began the sample. I fused Lite Steam-a-Seam 2 on the back side of every buck fabric prior to running it through the die-cut machine. The machine will handle about 3 layers, so that required about 5-6 passes to cut sixteen Buck Heads.

After all the Buck Heads were ready, I cut the background fabrics to size and fused the heads in place. I use a steam press in my studio, which makes all the fusing more efficient and it results in a good, strong bond. This is how the rest went:

  • Make the quilt top.
  • Write a rough draft of the pattern as I sew.
  • Stitch the applique´ on my HandiQuilter long arm machine.
  • Reload the quilt with batting and backing. Quilting time!
  • Bind the quilt.
  • Photograph the quilt for the pattern. (This involved a trip to the Biltmore House in Asheville, NC!)
  • Edit photos.
  • Figure fabrics for X number of quilts and place an order with Art Gallery Fabrics.
  • Order a boat load of Lite Steam a Seam2.
  • Cut Buck Head fabrics and Steam a Seam to size for each block, 16 per quilt kit.
  • Fuse Steam a Seam to each fabric, one by one.
  • Run fabrics through die-cut machine.
  • Cut fabrics for background blocks, sashing, outer border and binding.
  • Prepare final draft of pattern and order copies.
  • Assemble and package quilt kits.
  • Begin dreaming about the next quilt I'll make...

Happy Sewing! Thanks for visiting! God bless, Maxie

Lambkin Goes To Spring Quilt Market!

It's that time again...Spring Quilt Market with all the preparations and excitement for new fabric lines, notions and products! I always anticipate Bonnie's new fabric lines and have the unique opportunity to get my hands on them before they hit the stores! I'm excited to share two little quilts made from the line, with a video, (below) sharing a few of my favorite sewing features on my machine.

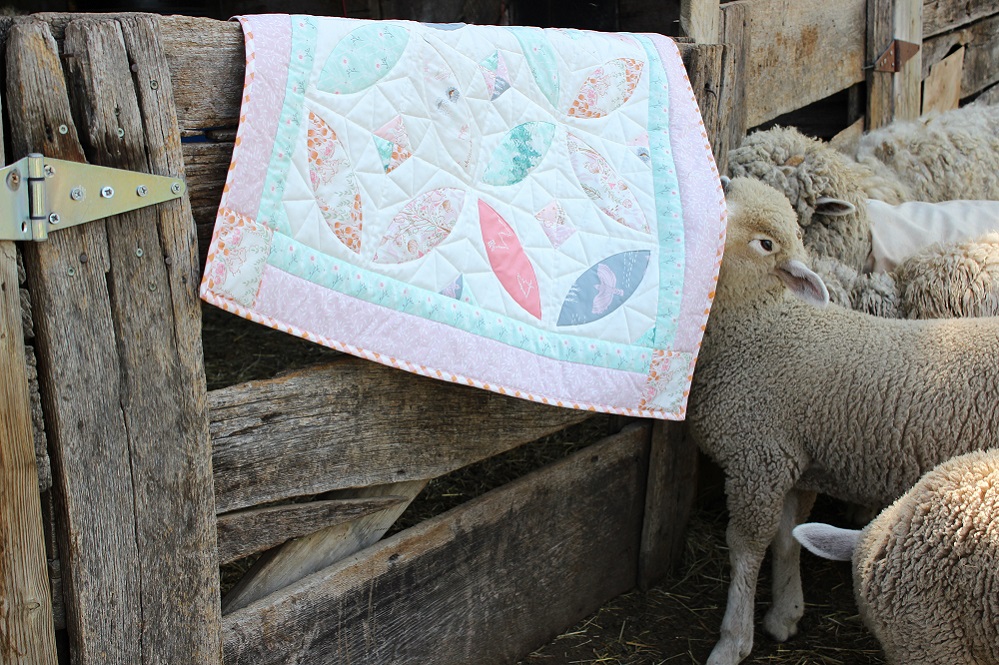
Little Lambkin loves it!

Bonnie's newest line, Lambkin, will be released by Art Gallery Fabrics in August, 2017, and it's justifiably as sweet as all her previous lines!

Lambkin Fabric by Bonnie Christine for Art Gallery Fabrics
Both Quilts.jpg

Both quilts are made using the new pattern, Orange Blossom, from Plum Easy Patterns by Bethany Miller. The petals are not fused in place, but sewn! Don't leave, please, I promise this is easy and that you'll love the technique Bethany uses! (I'll link to Bethany's video tutorial at the end of this post!)

Bethany uses freezer paper templates for perfect curved edges and seams. Her pattern is also layer-cake friendly for a scrappy look.

Orange Blossom Quilt by Plum Easy Designs

Let me share with you three of my favorite sewing features on Baby Lock's Destiny sewing machine (These features are available on several other Baby Lock models as well!)

Maxie shares three features on Baby Lock's Destiny sewing machine that make sewing easier, more accurate, and more fun!

Orange Blossom Blocks ready for assembly!
Orange Blossom by Plum Easy Patterns, made with Lambkin fabrics by Bonnie Christine for Art Gallery Fabrics

To view Bethany Miller's video tutorial for Orange Blossom Quilts click here! Thanks for visiting today! Happy sewing and God bless! Maxie

Make an Easter Apron Tonight!

Just in time to make that strawberry pie, this apron is a quick project, perfect for your cooking day on Easter or to tuck into an Easter basket as a gift! Made from a tea towel, nothing could be easier or faster to create. You'll be in and out of the sewing room in no time!


Tea Towel Apron

Supplies include a tea towel (I used Riley Blake's Bunnies and Cream towel and prints), 1/2 yard fabric for a ruffle and pocket, 1/4 yard for neck/tie strap and a scrap for the applique monogram.

Want to fancy it up a bit? Try adding an applique´monogram. I chose a circular monogram, like this one from Designs by JuJu, stitched on my Baby Lock Destiny. Using the camera for placement made it a breeze to center.

Applique´Monogram

After stitching the monogram, the first step is to shape the apron by trimming away a triangle from each top corner. Refer to the photo below to see the approximate size to trim away. Nothing is concrete here, just trim the corners, bearing in mind that you will fold about 1.25" to the back side and stitch along the edge to form a casing for the neck strap/ties.

Trimming the apron.

Next, round the bottom two corners. Serge or zig-zag all the raw edges. Press under 1/4" on the top, angled corners and fold about 1.25" to the back side. Stitch along the pressed edge to form the strap casing. Make the strap by cutting three 2.5" strips, width of fabric and sewing them end to end. Sew into a long tube and turn. A tube turner is your best friend here! For this long strap, leave the opening for turning in the mid-section. This allows you to stitch across each end for a nice finish, and turning half the tube at a time is much easier than turning the whole long tube.

Narrow hem foot. With a lamb.

For the ruffle, cut three 4" strips, width of fabric. Stitch together end to end. I like to use this rolled hemmer foot to finish each long side of the ruffle. It leaves a very professional, clean finish. Practice just a bit and you'll be a pro!

Ruffle edge with a narrow hem finish.

Fold under the short ends of the ruffle strip twice and stitch in place to finish the ends. Gather the ruffle strip to fit the apron's edge, beginning and ending at the bottom of the strap casing on each side. Lay the gathering over the serged/zig-zaged edged, overlapping the edge by about 1/2", and straight stitch it in place.

Run the tie/neck strap through the casings and toss on a sweet little pocket, if you like, and you're finished! Enjoy!

Thanks for stopping by! Happy sewing and God bless!

Maxie

Homemade Christmas Cheer

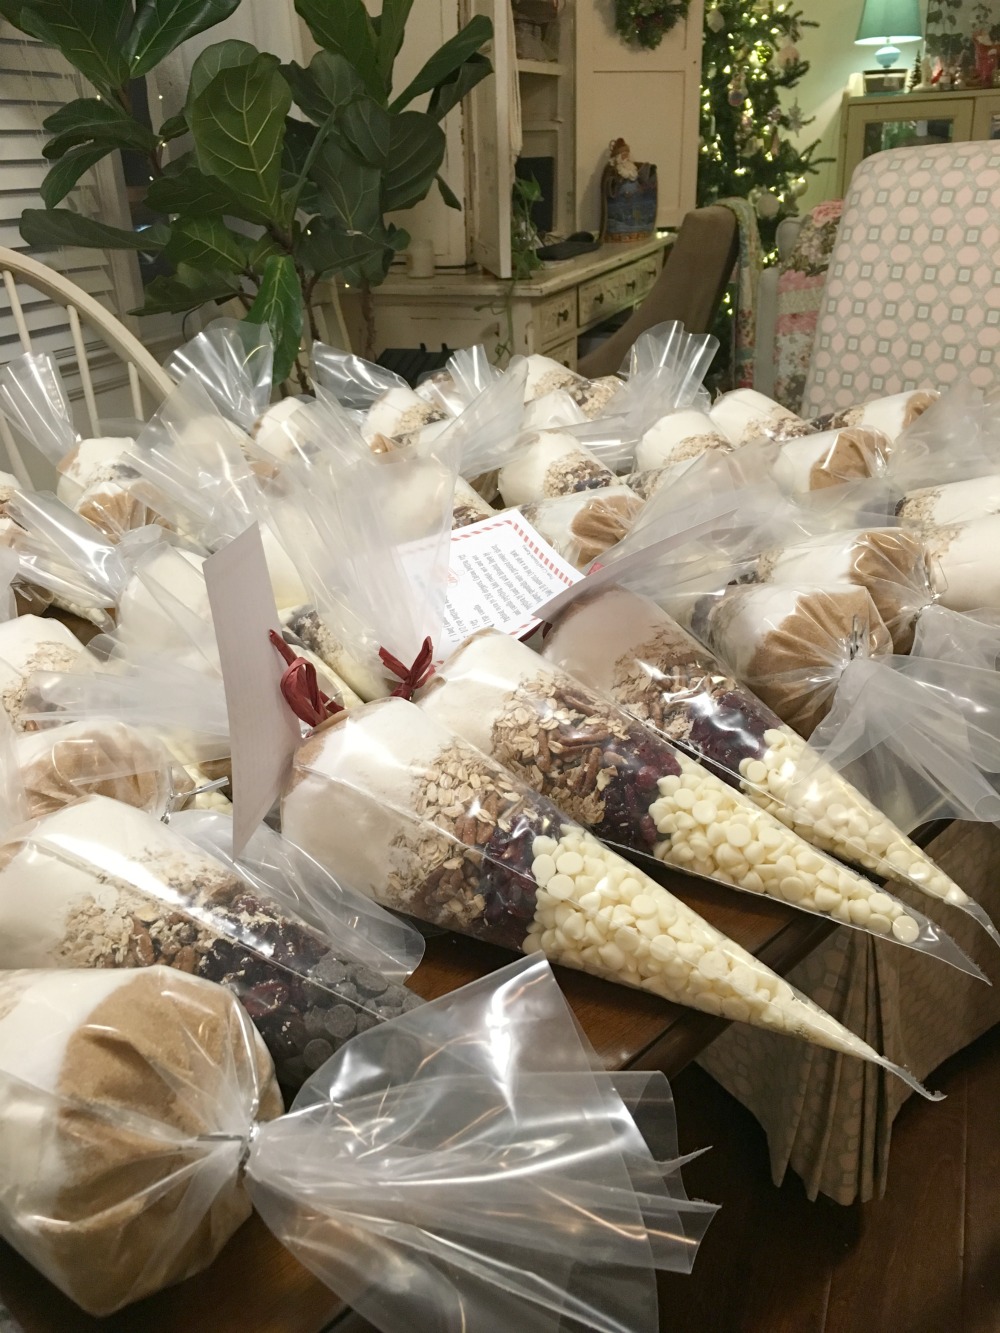
I posted this picture of my annual cookie mix marathon on Instagram yesterday and had so many requests for the recipe that I decided the best way to provide that would be in a blog post with instructions...so, here ya go!

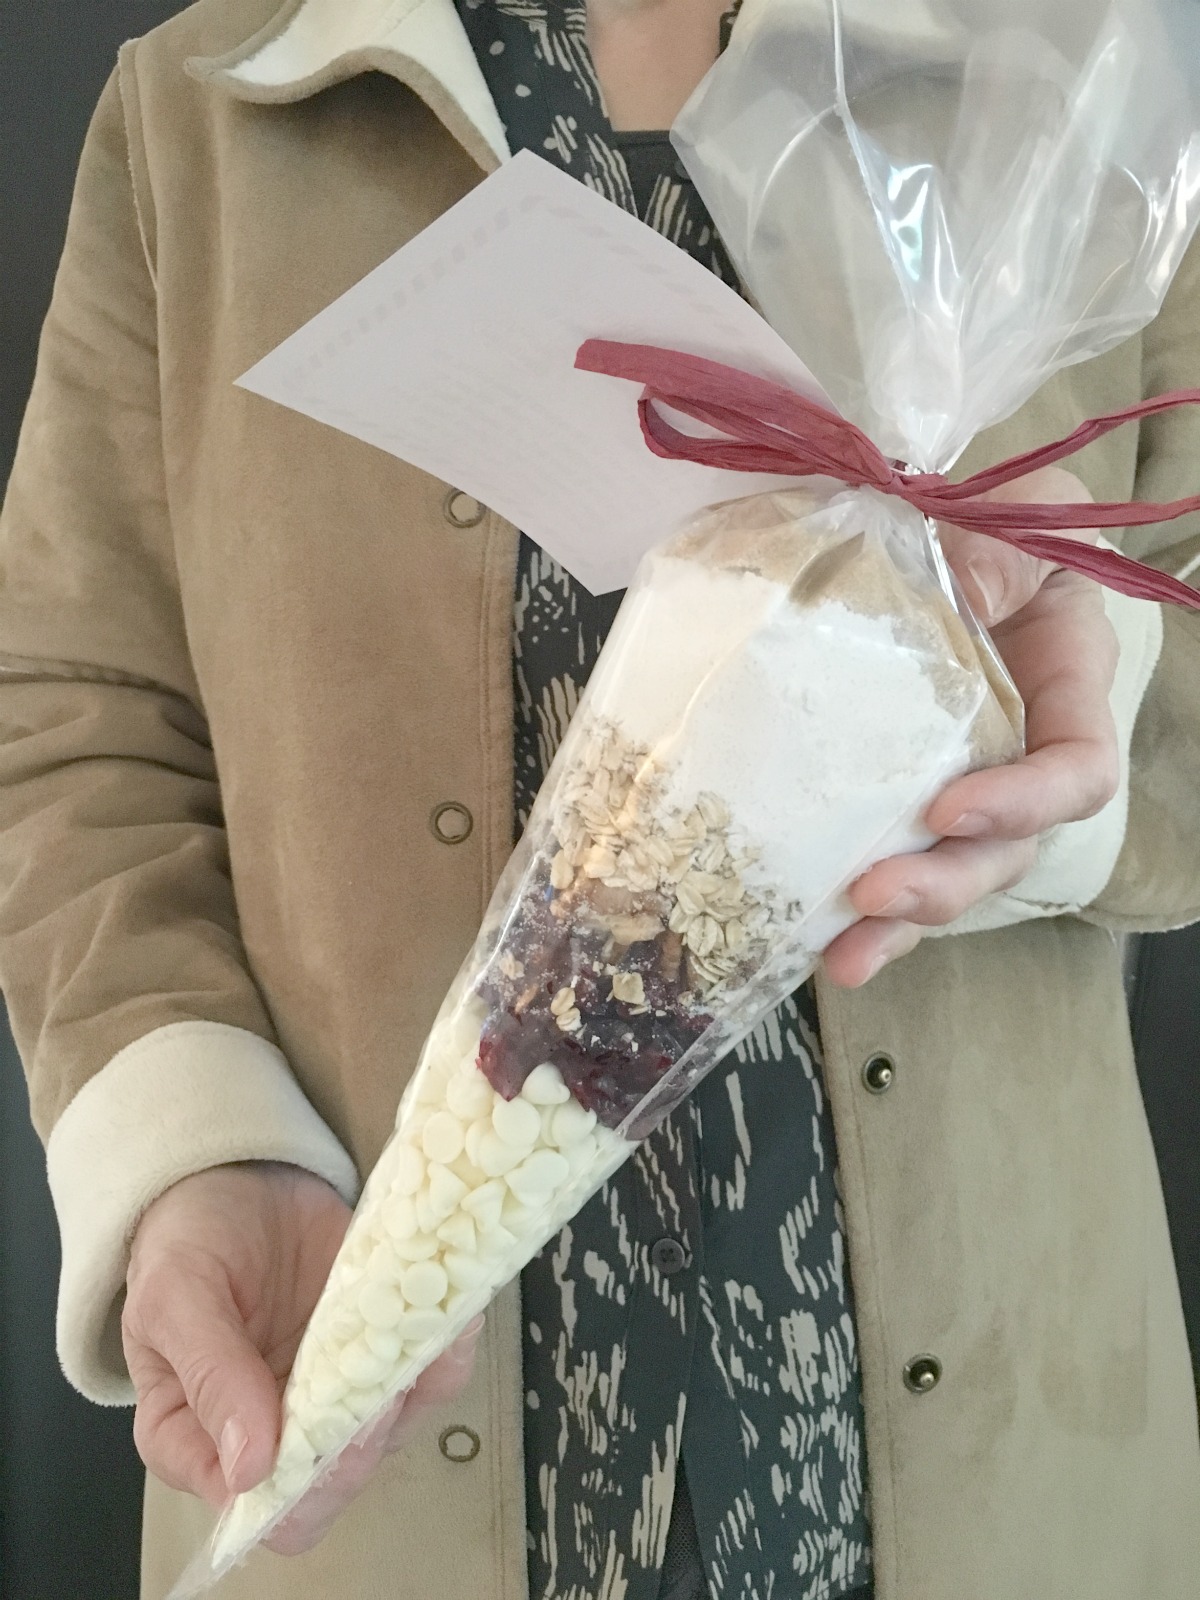
Cookie Mix Gifting

I love to make these in bulk to give away to folks around town that we appreciate all year (my hairdresser, the mailman, the post office counter employees, dentist office, etc.) They also make great hostess gifts and family treats at get-togethers . You've probably seen similar things given in glass jars, but I think the cone shaped bags look more festive and Christmas-y, like an icicle hanging from Santa's sleigh!

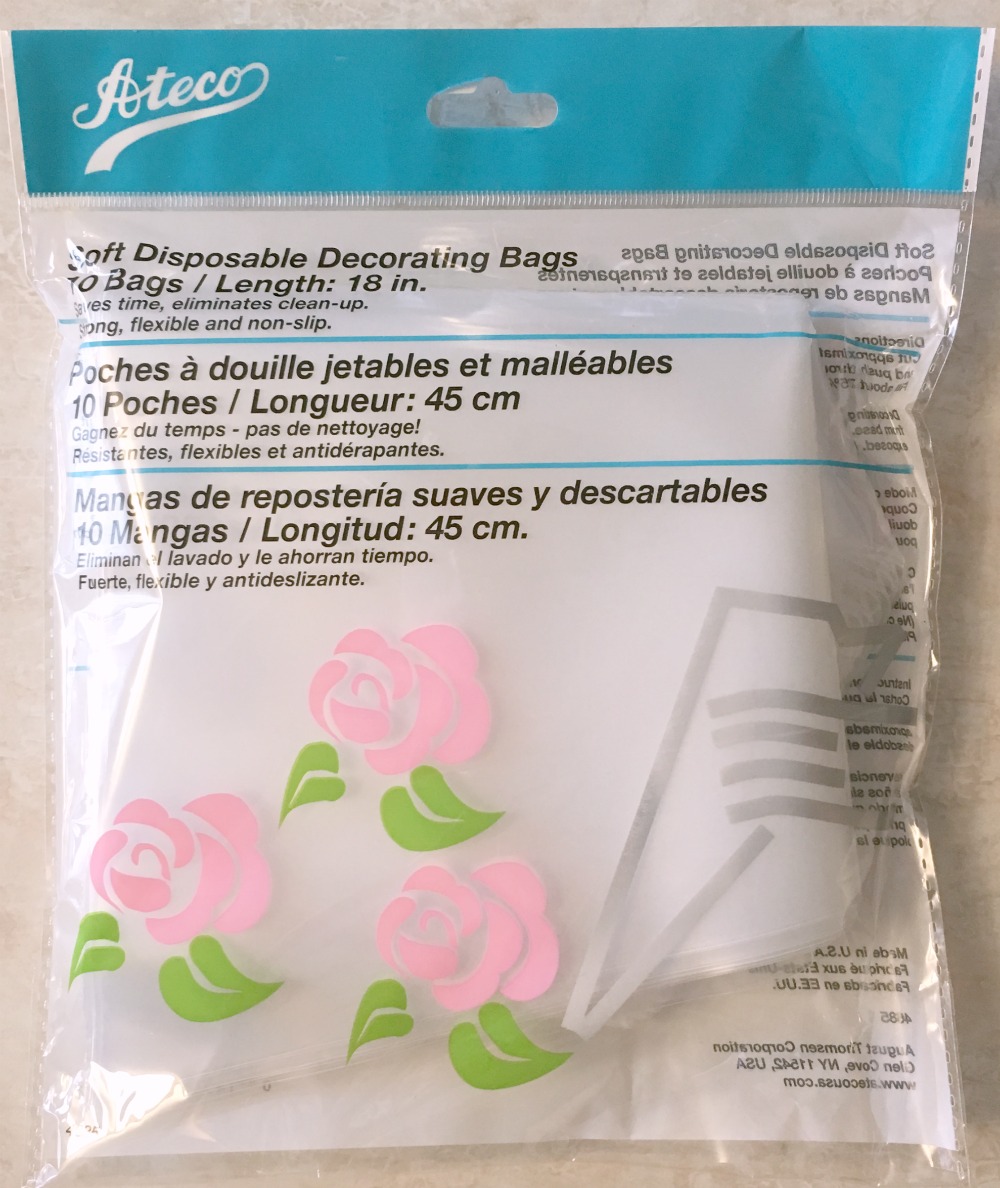
Ateco 18" Piping Bag

I pack the mixes in this 18" disposable piping bag, actually made for icing. I've tried the 17" bags (made by a different company), but they aren't as wide and will not hold the recipe. These can be found at kitchen stores like Kitchen Collection, or maybe your local kitchen supply store. While Wal-mart and Michael's carry cake decorating supplies, they only stock the 12" bags.

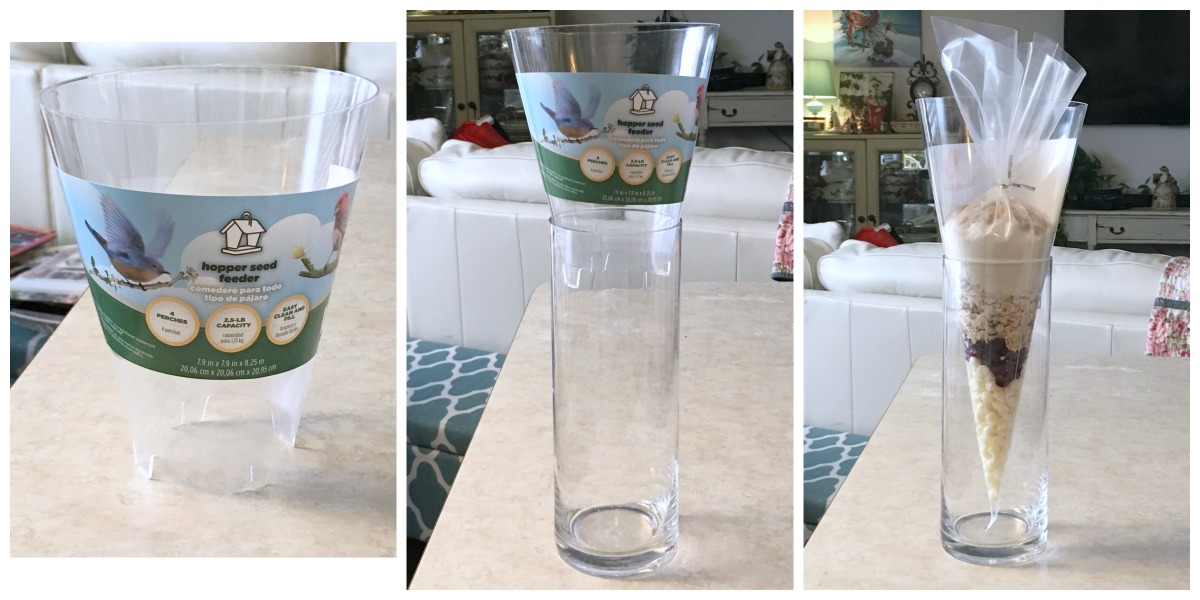
Improvised Piping Bag Stand

I have a piping bag support. Somewhere. We've moved twice and I've bought it twice and they are both packed away...so my husband came to the rescue and made one for me, and his version actually works better than the real thing! He went to Lowe's and found a bird feeder, made by Garden Treasures, for $6 that has a removable top shaped like a cone! It just fit inside a 10" vase, making the perfect height. The goal is that the last layer of brown sugar is supported firmly for packing.

Cookie Mix Icicle Bag

The recipe: (see below for vegan version)

  • 1/2 cut white or milk chocolate chips
  • 1/2 cup dried sweetened cranberries
  • 1/2 cup nuts
  • 1/2 cup oats
  • 1/2 teaspoon each soda and salt
  • 1 & 1/8 cup all-purpose flour
  • 1/3 cup sugar
  • 1/3 cup packed brown sugar (I just put in a heaping 1/3 cup)

I usually make about 50 bags, so working assembly line fashion with large bowls is the most efficient method for packing. Using actual size measuring cups as scoops also helps. Layer the ingredients in the bag in the order given above. Shake gently to settle after each addition. With the bag in a stand, pack the brown sugar firmly (the bottom of a glass works great). If you change the order of ingredients, be sure to keep the brown sugar last (on top) because packing it helps to hold everything else in place nicely. Twist the top and close with a twist tie. (I found shiny metal ones at Michael's. A red or green chenille stick would also work great.)

Attach baking instructions and your Christmas sentiments with a ribbon to the bag. These could be printed on a sticker and applied to the side of the bag:

Cranberry Kringles

  • 1 bag Cranberry Kringles Mix
  • 1/2 cup butter or margarine
  • 1 egg
  • 1 tsp. vanilla

Mix all ingredients by hand. Drop by spoonfulls onto parchment lined baking sheet. Bake at 350º for 8-10 minutes. Cool on wire rack.

I had to make a few vegan mixes for Bonnie, David, Bear and Ollie. It was simple by substituting vegan chocolate chips and changing the directions to include 1/2 cup Earth Balance and 1/3 cup apple sauce or egg re-placer. Bear thought they were beautiful and when Bonnie helped me with the last photo (above) he said, "Me want to hold it like a baby, too." So he did.

Bear

Enjoy making and giving this Christmas season! Thanks for stopping by and God bless! Maxie