Machine Embroidery, Sweets for the Sweet!

I've been a fan of Evy Hawkins' work for a while. You may be familiar with her beautiful Sashiko techniques, or her monograms and embroidery designs, or her machine cutwork (she teaches a Machine Embroidered Cutwork Class on Craftsy). Her website is a wonderland of delicately beautiful needlework, ranging from quilting to hand embroidery. It's packed with projects, tutorials and inspiration, so brew a cup of tea and have a visit with Evy!

Baby Deer Embroidery Design by Evy Hawkins

When I first saw her Baby Deer embroidery designs I knew I had to make something for my new granddaughter, Ollie Doe! I could hardly wait for the 5 second download to complete. By the way, she offers this for both hand and machine embroiderers.

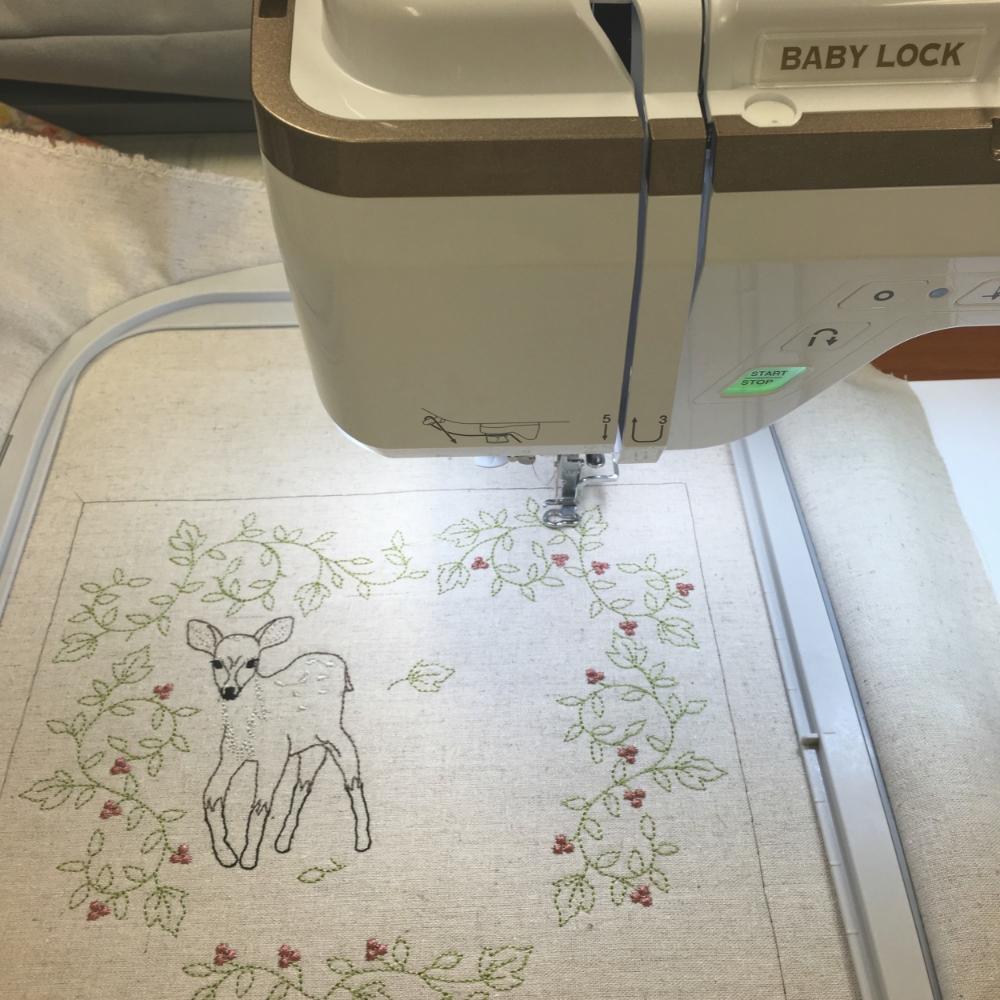
Baby Lock Destiny Sewing and Embroidery Machine
Baby Deer by Evy Hawkins (abitofstitch.com)

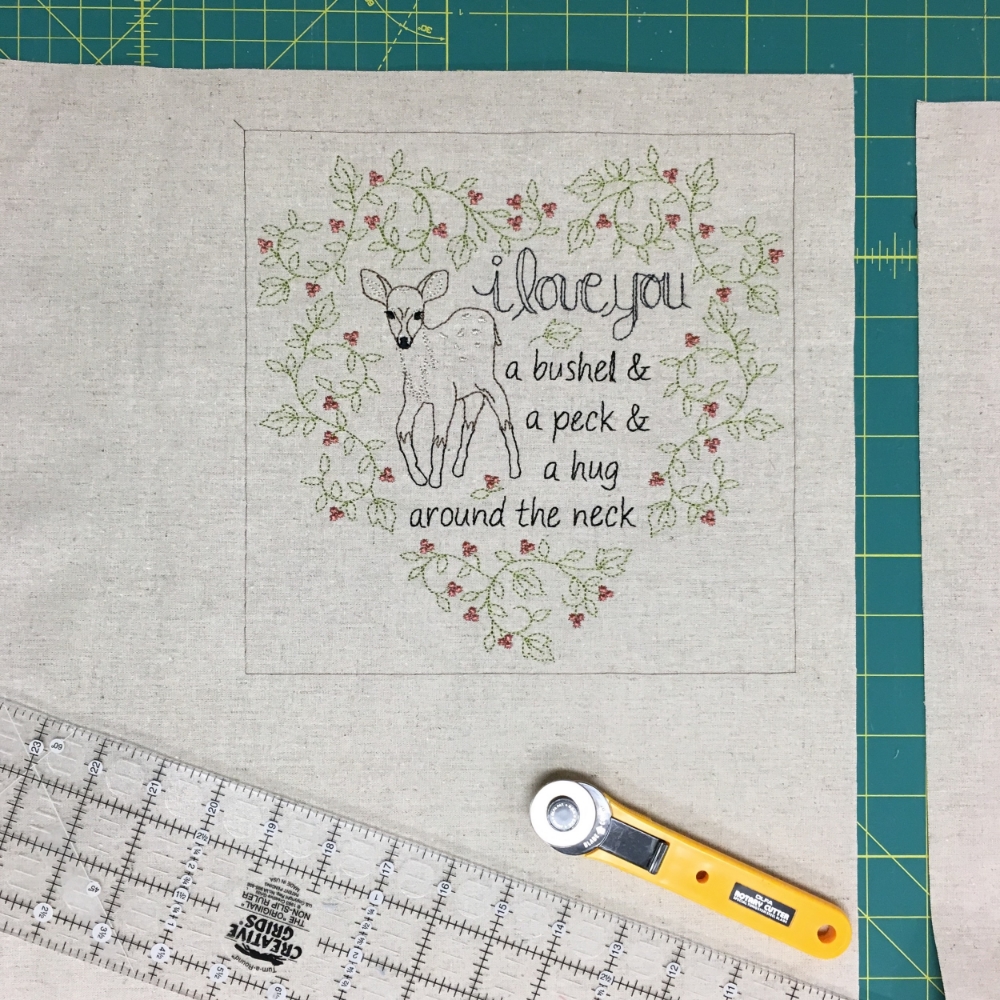
My Baby Lock Destiny stitched it out perfectly! Tip: My machine has an optional basting feature, which adds a basting stitch around the design, spaced perfectly around four sides. Before removing the stitches, I used them to square up the embroidery piece perfectly! I simply measured 1" off the stitching line and trimmed. See photo below. Ready for the borders!

Using the basting stitching line as a guide for trimming.

I added 3" borders of pink check printed linen and piping and it was ready for little Ollie's visit in no time! Thanks, Evy, for your beautiful work!

And thank you for visiting! Happy Sewing and God bless. Maxie

The LookBook: Forest Floor by Bonnie Christine

I love the day that Art Gallery releases their beautiful LookBooks for their fabric lines. You'll find one for each collection, and I'm so excited that the eagerly anticipated LookBook for Bonnie Christine's newest line, Forest Floor is here! Click the book to view! All fabrics are available with free shipping at A Stitch in Time.

This project was particularly fun for me for several reasons. First of all, not only did I make a few of the projects inside, I was able to tag along on the photo shoot, which took place in Pisgah Forest, NC. The photographs taken that day were shot by Callie Lynch, photographer and long time friend of Bonnie's.* What fun we had, traipsing around in the forest, clinging to logs and wading in the creeks, while finding spots to make wardrobe changes in the frigid weather!

Second, Bonnie is on the cover and in several photos inside!  A few of the other reasons I love this book are listed below:

  • My granddaughter, Ollie Doe, is on pages 19 and 43! You might remember that I shared one of the outfits she's wearing in a recent post, Sewing for Baby Girls.
  • You'll find my grandson, Bear, on page 43!
  • I have two new quilt patterns (Forest Path and Zippy Strippy), available as downloads on pages 29 and 31. Both of these quilts, along with several other projects from the book are on display at my quilt shop in Franklin, NC, A Stitch in Time.
  • You are probably familiar with Sarah Overton and her blog, My Crowded Nest. Sarah, who works with me at my quilt shop, has three marvelous bags with downloadable patterns featured in the book!

The book is packed with projects, many made by other pattern designers, and each have links to their downloadable patterns! So, have fun perusing the book! I hope it inspires you to take to the forest!

*Other photography credits are listed under info with the Look Book.

Uncomplicated Quilting

Sometimes a quilter's life just calls for the uncomplicated quilt. One that can be pieced one day, quilted and bound the next, and enjoyed for years to come! Zippy Strippy to the rescue!

Pieced and Quilted by Sarah Overton. https://mycrowdednest.wordpress.com/                             photo by Callie Lynch

Pieced and Quilted by Sarah Overton. https://mycrowdednest.wordpress.com/                             photo by Callie Lynch

This pattern, available here, is perfect for showing off a full line of fabrics and how well they play together. I've made several in the past, but for this Zippy Strippy, I chose Forest Floor fabrics by Bonnie Christine for Art Gallery Fabrics. Art Gallery offered one of the prints from the line in voile, which I decided to use for the backing! Pima Cottons for the top, organic cotton batting, and billowy voile for the back pretty much guaranteed the softest, cuddliest quilt I'd ever made!

Bonnie Christine all wrapped up in Forest Floor Fabric!

We took to the forest to photograph Forest Floor for Art Gallery's Look Book, and since it was a little chilly, Bonnie took the opportunity to bundle up! She said it was her favorite quilt, just because of the softness of the voile. If you've never tried using this ultra soft fabric, by all means, give it a try with your next quilt. By the way, the term voile comes from France and means veil. As a proper southerner, I tend to pronounce it as if it rhymes with spoil, but here's a YouTube video sharing the correct pronunciation. I stand corrected. No matter how you say it, it's soft, drapey fibers are wonderful for quilts, garments, scarves, window treatments and more!

Bonnie Christine, enjoying a quilty embrace.

You'll find Forest Floor fabrics, with free shipping, here. While on the website, don't forget to check out Bonnie's other fabric lines, which include 100% Pima Cotton, Cotton knits, canvas and, of course, voile!

Soft, billowy voile for a quilt backing! Forest Floor fabrics by Bonnie Christine for Art Gallery Fabrics.

Thanks for visiting! Happy sewing and God bless! Maxie

Using the Silhouette Cameo Cutter to Repurpose Art!

So...we have been remodeling our home and I've been enjoying some DIY projects here and there. This one came from a gift from my husband. A little back story first...

We took almost 2 years to complete our little space, and the bedroom was practically the last thing on the list. We ran out of hardwood, so I had to settle for carpet. I researched my options and, for several reasons, landed on an organic wool from a wonderful company in Dalton, Ga.,  Earth Weave. They list on their website the many benefits from wool...did you know that it actually purifies the air? It was a splurge, but after all, my room was small. We planned the budget and decided to go for it! Installation day came, and it was as lovely and soft as I had hoped it would be. But it smelled of, well, sheep! Ok, a barn full of sheep. Wet sheep.

I figured the smell would dissipate, and it eventually did. But not until my husband had plenty of opportunities to tease me. One day he smuggled in a very old, framed canvas photo of sheep in a pasture and hung it in the room. He thought it was very funny, but I actually loved the picture so much that I decided to preserve it and make it mine by adding a sweet verse!

Silhouette Cameo Vinyl

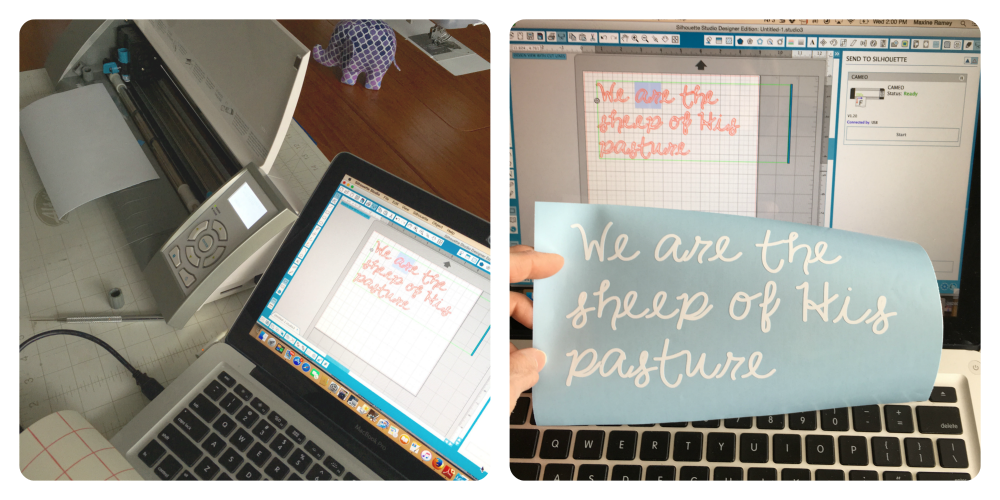
The scripture verse is not painted on the picture, but is vinyl that I cut with my Silhouette Cameo machine. The font was created by my daughter, Bonnie Christine, in her own handwriting! The Silhouette Design Studio software is so easy to use that it made the whole process fast and easy!

Silhouette Design Studio Software

I love that this font is Bonnie's handwriting. One day we were playing around with an IPad app that creates fonts from handwriting. She just whipped out A-Z and I saved it to my computer. Since the Silhouette automatically imports all the fonts on my computer into the Design Software, Bonnie's Handwriting was right there, ready to use!

Silhouette Cameo Cutter

I cut the words apart so that I would be able to place them exactly as I wanted them on the picture.

Vinyl Wall Clings with the Silhouette Cameo Cutter

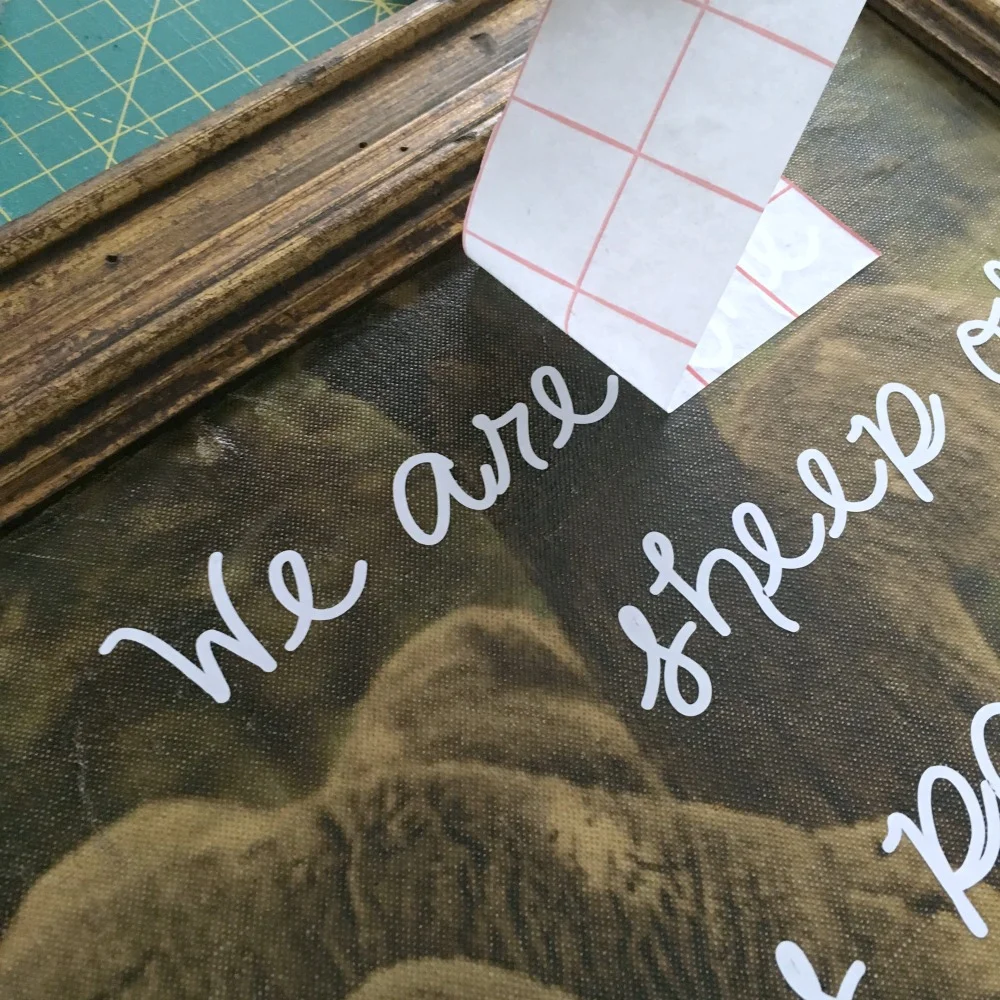
When transferring a vinyl decal, the first step is to place a piece of vinyl transfer paper over the top of the design. The red grid lines make it easy to keep things nice and straight. (First photo.) Simply peel it off it's backing, place it over the vinyl lettering and rub to transfer the letters to the grid transfer sheet. (Middle photo.) Peel up the transfer sheet and it's ready to set in place. (Third photo.)

Vinyl Wall Decals with the Silhouette Cameo Cutter

Place the transfer sheet in position and rub to transfer the lettering to the surface. It's as easy as that! And did you know that Bonnie also designs files for Silhouette? Check them out here! They coordinate with her fabric lines, but can be used for anything you can dream up! I have another DIY project in my head using one of her designs, so I'll be sure to share that with you soon!

And after it's all said and done, I love my wool carpet!

Organic wool carpeting

Thanks for visiting! Happy sewing (or cutting) and God bless! Maxie

Sewing for A Baby Girl

You probably know already that I'm the happy Mimi of a little 2 year old boy named Bear, and you also probably know that he has a little sister named Ollie Doe. Bear affectionately calls her "Ah-ee Doe". I love how they already love each other.

Bear and Ollie Doe

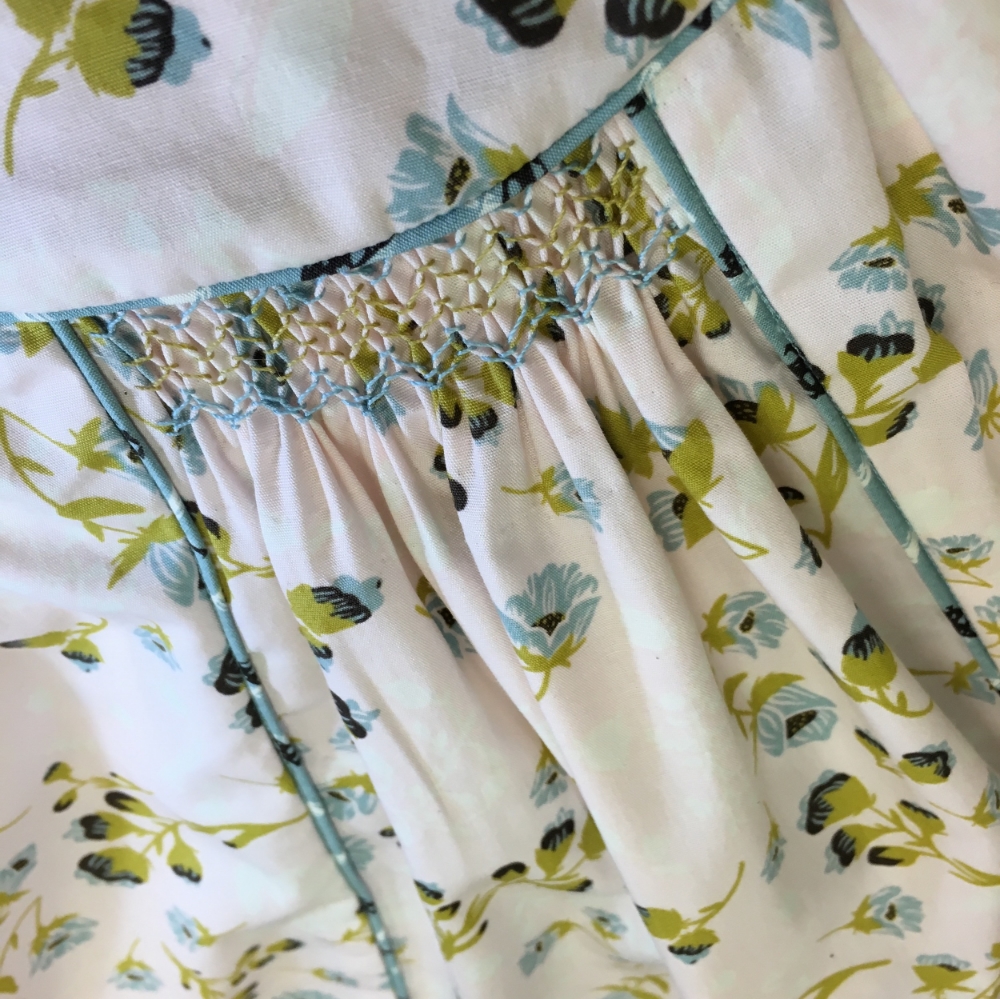
When my daughters were small I enjoyed smocking and heirloom sewing, so I thought I'd try my hand at something a little modern with a touch of the old fashioned.

Smocking Bonnie Christine's Fabric

This little top is made from Bonnie Christine's latest line, Forest Floor, for Art Gallery Fabrics. We've been working on projects for the Lookbook that will accompany the line's release, and I thought I'd share a little peek with you today.

Getting ready to pleat the fabric.

The first thing to do was to find a pattern that would give me a place to insert the smocking. Kwik Sew 3689 fit the bill with a center gathered front section, just below the yoke. I cut that part of the pattern, adding a couple more inches at the fold to allow for a little fuller panel.

Smocking Stitches
Inserting piping

The piping, made from bias strips, is applied between the seams. I have two presser feet that help to make the piping smooth and perfect. In the above photo, left, I am using the Mini Piping Foot, which has a small tunnel under the foot that rides over the cord inside the piping. Moving the needle into a position that will sew just one thread closer to the cord will make that piping thread (shown with white thread) invisible.

The photo on the right shows my preferred way to attach the two panels. The normal technique is to sandwich the piping between the two panels placed right sides together and sew, hoping to sew at just the precise place that won't be too close or too far away from the piping. Instead, I sew the piping to one panel (which is what is happening in the left photo) and press the seam allowance to the wrong side, flipping the piping over on the panel's edge. Then I just lay the piped panel over the seam allowance of the piece it will be sewn to, pin in place and stitch in the ditch, catching the seam allowance of the unpiped panel in the process. I use the Edge Joining Foot for this technique, and it really is very helpful when sewing piped fabric to gathers or smocking because I am working from the top side and all fabrics are visible.

Photo by Callie Lynch Photography

I think Ollie Doe likes it! For more pictures, just watch for Art Gallery Fabrics' Look Book link here soon!

Thanks for visiting! Happy Sewing and God bless! Maxie