Reflecting on the Mirror Image

How often do you put to use some of those great features on your sewing machine? If you stick with me on a regular basis, I hope to help you begin to use a lot of your machine's special abilities that you might otherwise overlook. One great feature on most machines today is the mirror image. It's obviously needed for certain applications, such as when using the blanket stitch for applique´ and you just need the stitch's jump to work in the opposite direction for you. But what about a straight stitch? Could a mirror image be helpful for a straight stitch? Why, yes! I'll show you how I used it to make the sweet little bag shown in the photo below.

Bag is from Tilda's Summer Ideas, show above.

Bag is from Tilda's Summer Ideas, show above.

The mirror image feature does just what the name implies, flipping the stitch or design exactly opposite of the default setting. A scallop stitch that swoops to the right will swoop to the left when the mirror image is activated. That would be very helpful if you were stitching rows of decorative scallops down the front of a blouse and you wanted all the rows to the right of the center line to lay exactly opposite of the rows to the left of the center line. Janice Ferguson Sews has a great picture on her blog of decorative stitches that have been mirrored on the front of a garment. The need to mirror certain stitches is obvious, but let's look at mirroring a straight stitch. Here is the mirror image on the Baby Lock:

Baby Lock's Mirror Image Function

When I sew a ribbon on a piece of fabric, I like to stitch both sides in the same direction so that the fabric is not skewed. When stitching straight lines some people stitch one line in one direction and the second in the opposite direction, continually alternating sewing directions to 'even out' the layers. I can usually spot when this is done, because the fabric will slightly skew between the rows of stitching.

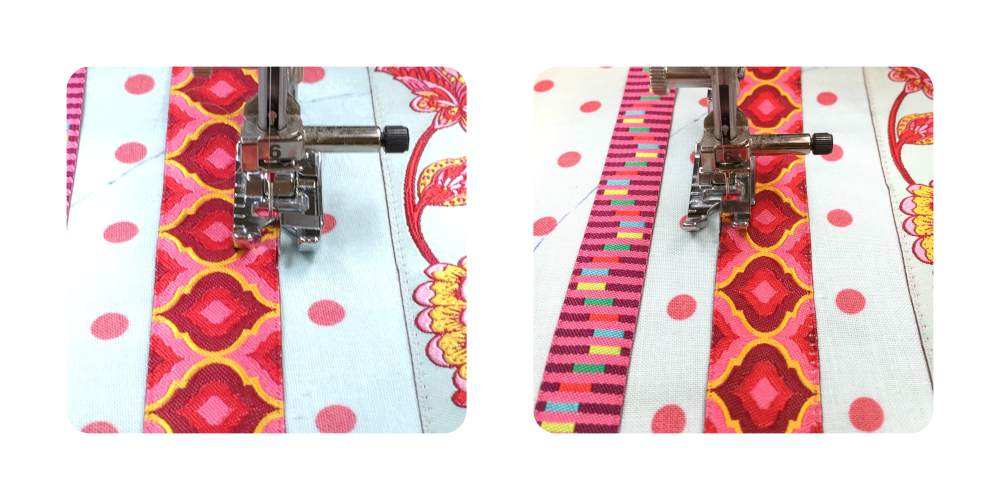
For this project, I used the Edge Joining Foot to stitch along the edge of the ribbon. I set my needle in the position that I wanted, and sewed down one edge (left photo, below). Rather than turn my project and change stitching directions for the other side, I simply touch my mirror image button and slip my fabric over until the other edge of the ribbon is positioned underneath the needle (right photo).  Because this foot has a centered metal 'fence' guide, placing the ribbon's edge along the fence assures perfectly aligned stitches! Moving the project and realigning it under the presser foot as before will ensure that both stitching lines will be the same distance from the ribbon's edge, and that no skewing will occur.

Using the mirror image function with a straight stitch.

Yes, the mirror image works great with your straight stitch when you need to use both sides of the presser foot to guide your stitching lines, both sewn in the same direction! Try it for purse handles, too. Can you share how the mirror image function has helped you?

Thanks for visiting! Happy Sewing and God bless, Maxie


Don't Fear the 'Y Seam'.

I promise 'Y Seams' are easy. Not sure what a 'Y Seam' is? Just as the name implies, it is three seams that come together at one point and form the shape of the letter 'Y'. Dissect a Y and you have three lines. Stitching such a seam is really very easy, but most quilters avoid doing so because they don't understand the construction or they think it might be too time consuming. Let's dispel those fears! I made the hexagon quilt below, and every seam is a 'Y Seam'! (Free pattern by Bonnie Christine and Maxie Makes!) Kit with precut hexies here.

The Honey Pot Quilt

This quilt really went together pretty fast, because there are no blocks to piece, and only simple seams to sew the hexies together. The picture below is a quilt unit from my current project that includes several 'Y Seams'. (At the end of this post is a link to the designer's website, where you'll find great construction tips and the free pattern for the quilt!)

Sewing Perfect 'Y Seams'

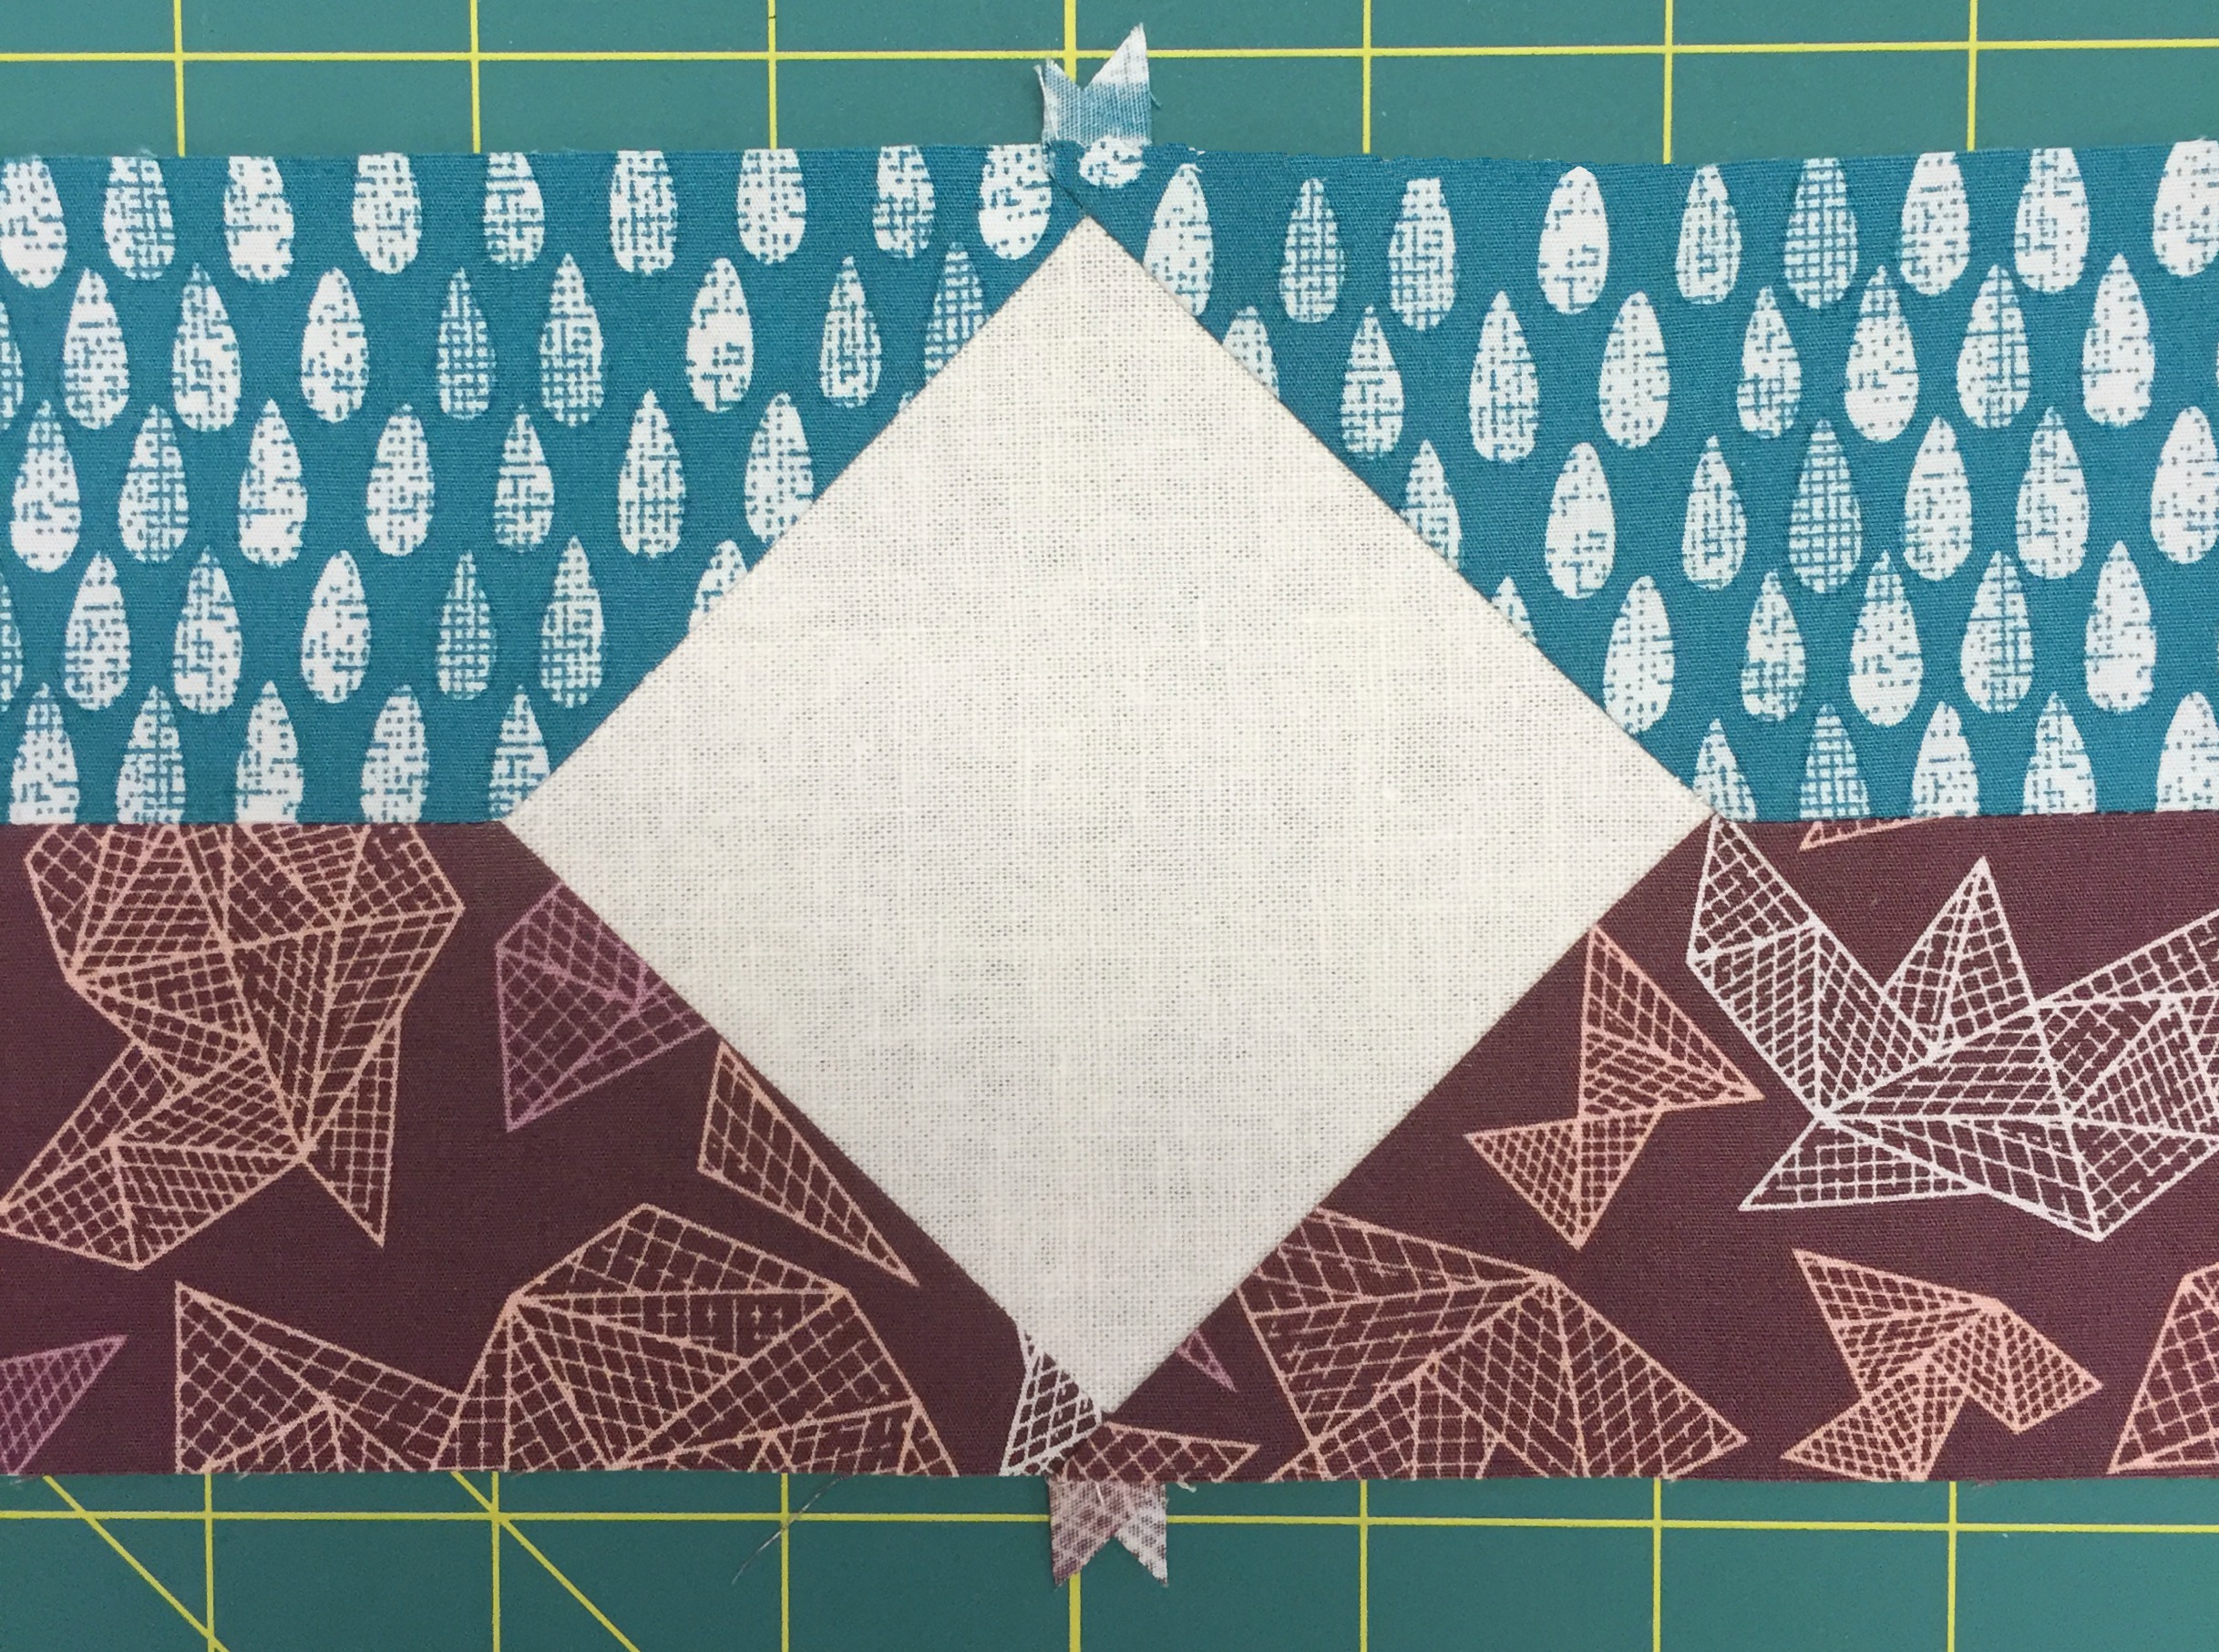
So, you see above two fabric strips that have a linen square sewn between them, in the seam. When I first saw the picture of this quilt on The Purl Bee's blog, I thought the squares were applique´d in place. Ah, no, those are all 'Y Seams'. Ok! The first step is to cut the ends of each of the four strips at 45º angles. The Purl Bee's blog shows how to prepare these strips. They are then sewn together, forming the first seam of the 'Y'.

Sewing a 'Y Seam'.
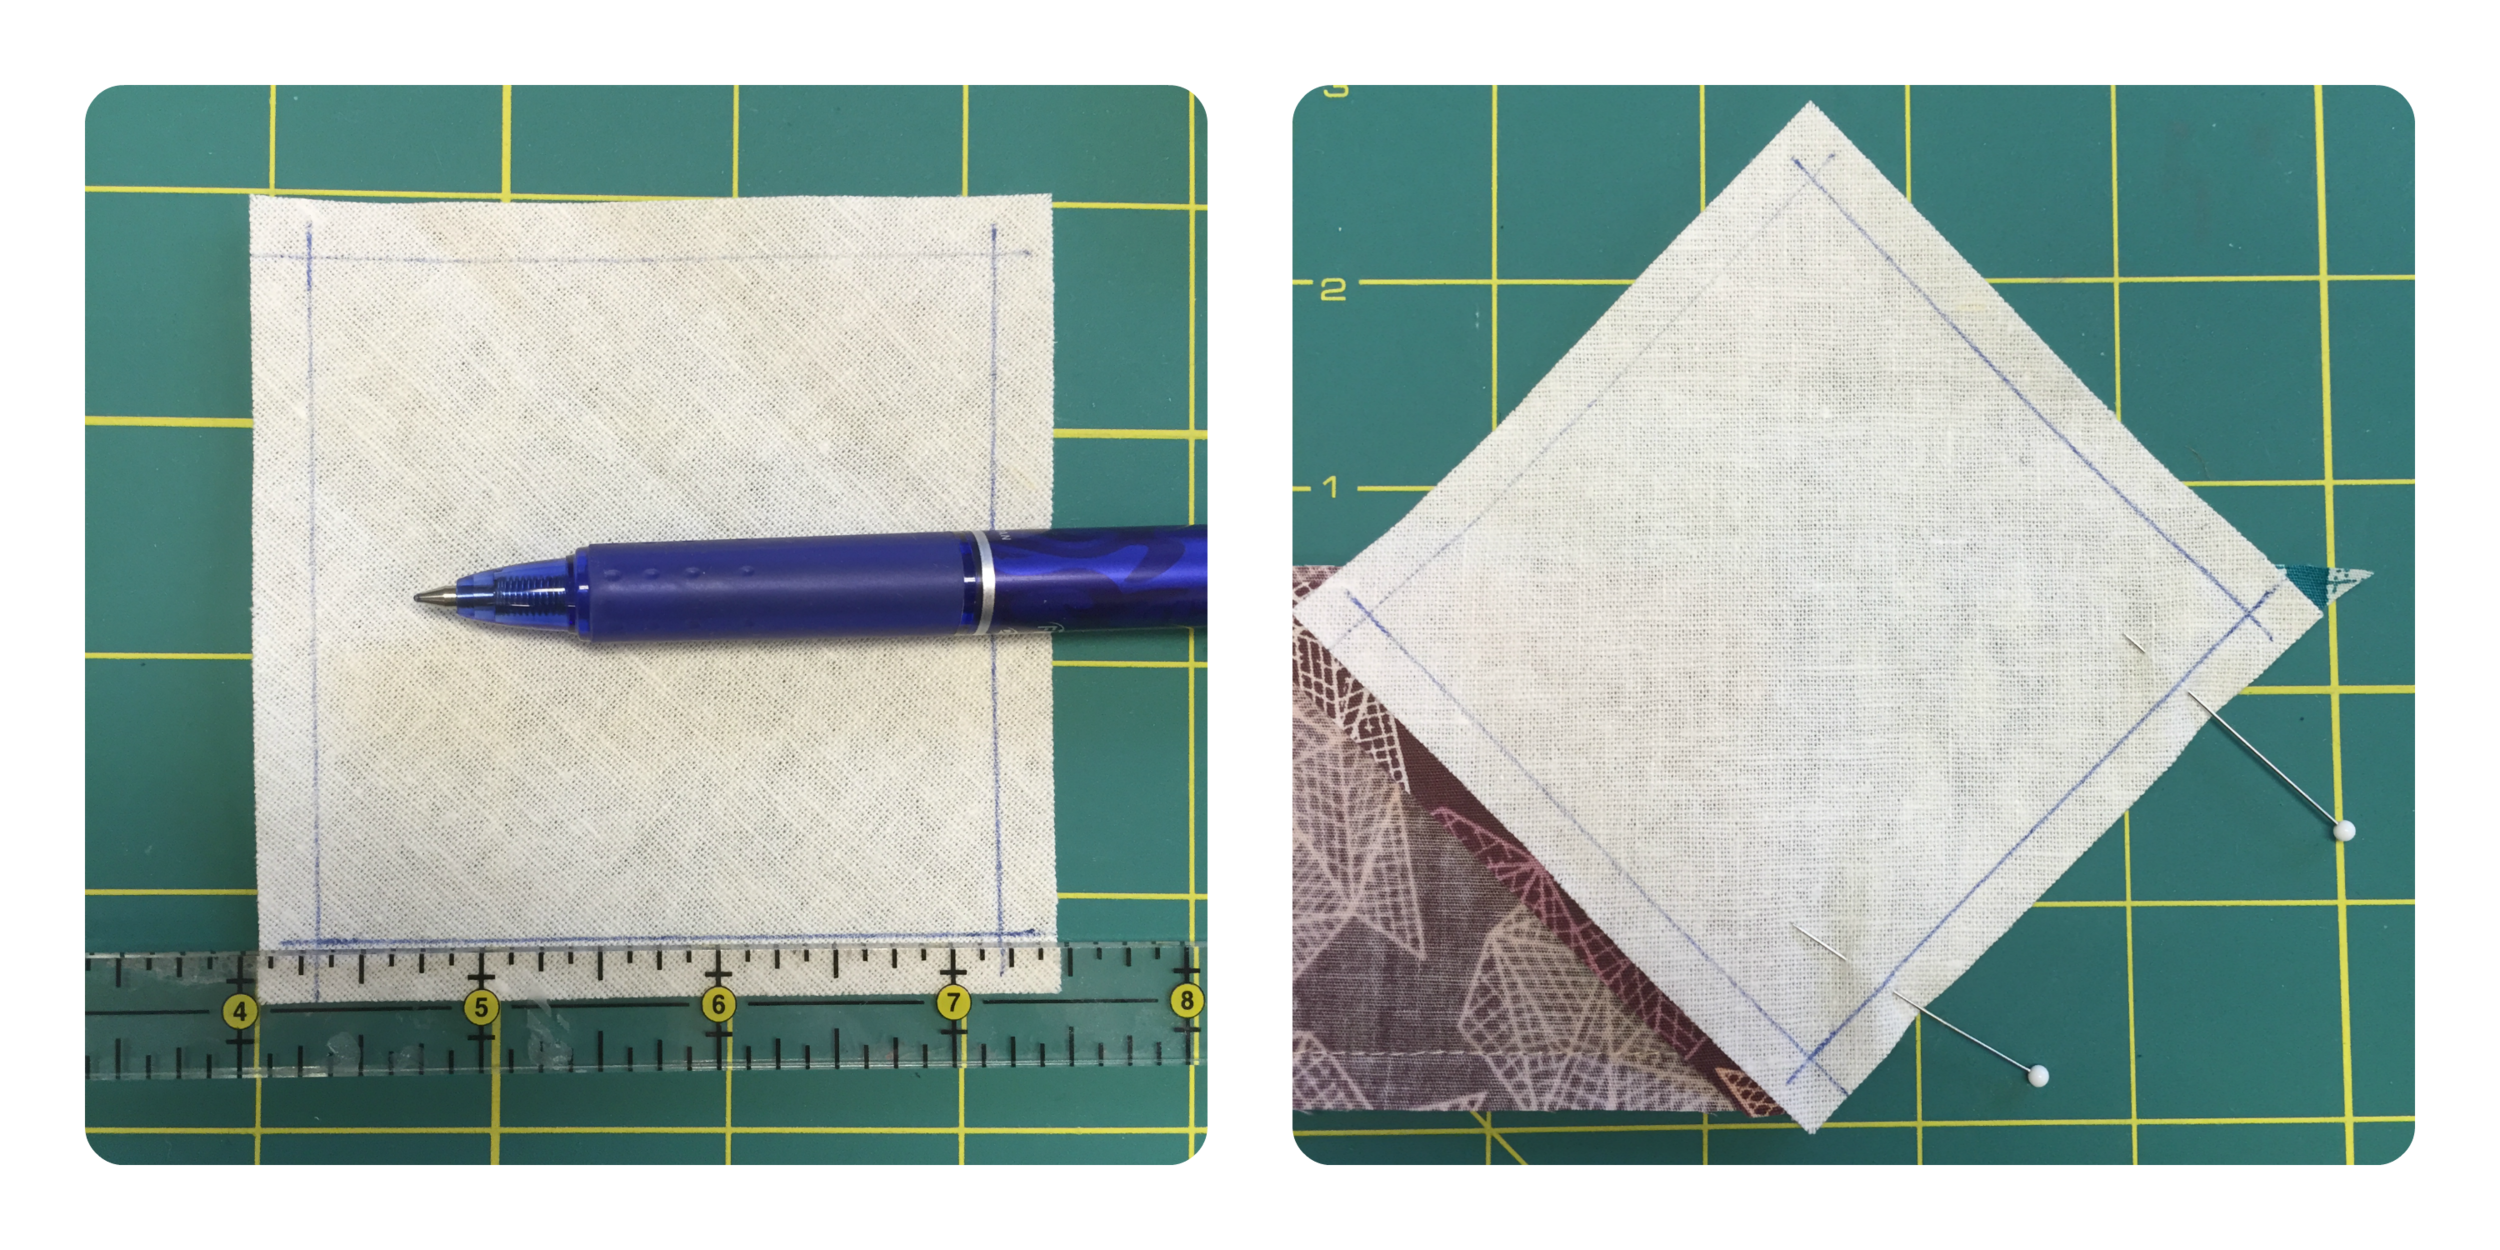
  1.  The photo on the left shows the 1/4" seam allowance drawn on all four sides of the square that will be sewn into the 'Y seam'. I used an iron-off marker, but this is really like training wheels on a bike. You can draw them on a few, but in no time at all you'll understand how the seam is constructed and you'll abandon the pen.
  2. Pin in place and stitch the seam, beginning and ending where your lines intersect. Be sure to secure the stitching at the beginning and ending of the seam. Tip: for a perfectly flat seam, stop just prior to reaching the intersection, just about the distance of one stitch length. Likewise, when you begin the seam, move just one stitch length away from the intersecting lines.
Sewing a 'Y Seam'
  1.  Remove the pieces of fabric from your machine. Line up the raw edges of the fabrics for the other seam. To do so, you'll need to fold your previously sewn seam out of the way.
  2. This laser guidebeam sure comes in handy when sewing across lines, especially imaginary lines! (Thank you, Baby Lock!) Another good excuse to ditch the marking pen! Stitch from point to point and press your seams so that everything is nice and flat!
Perfect 'Y Seams'!

This little quilt will be my version of the Agate Quilt from The Purl Bee. I'll share more of my quilt in a few days...it must be ready for Spring Quilt Market in less than 2 weeks!

Thanks for visiting! Now let's show those 'Y Seams' that we have no fear! Happy Sewing and God bless! Maxie


Ric-Rac Quilt Binding

I posted this photo of my ric rac quilt binding on Instagram and Facebook this past weekend, and received some requests for a tutorial! Here ya go...!

Ric Rack Quilt Binding

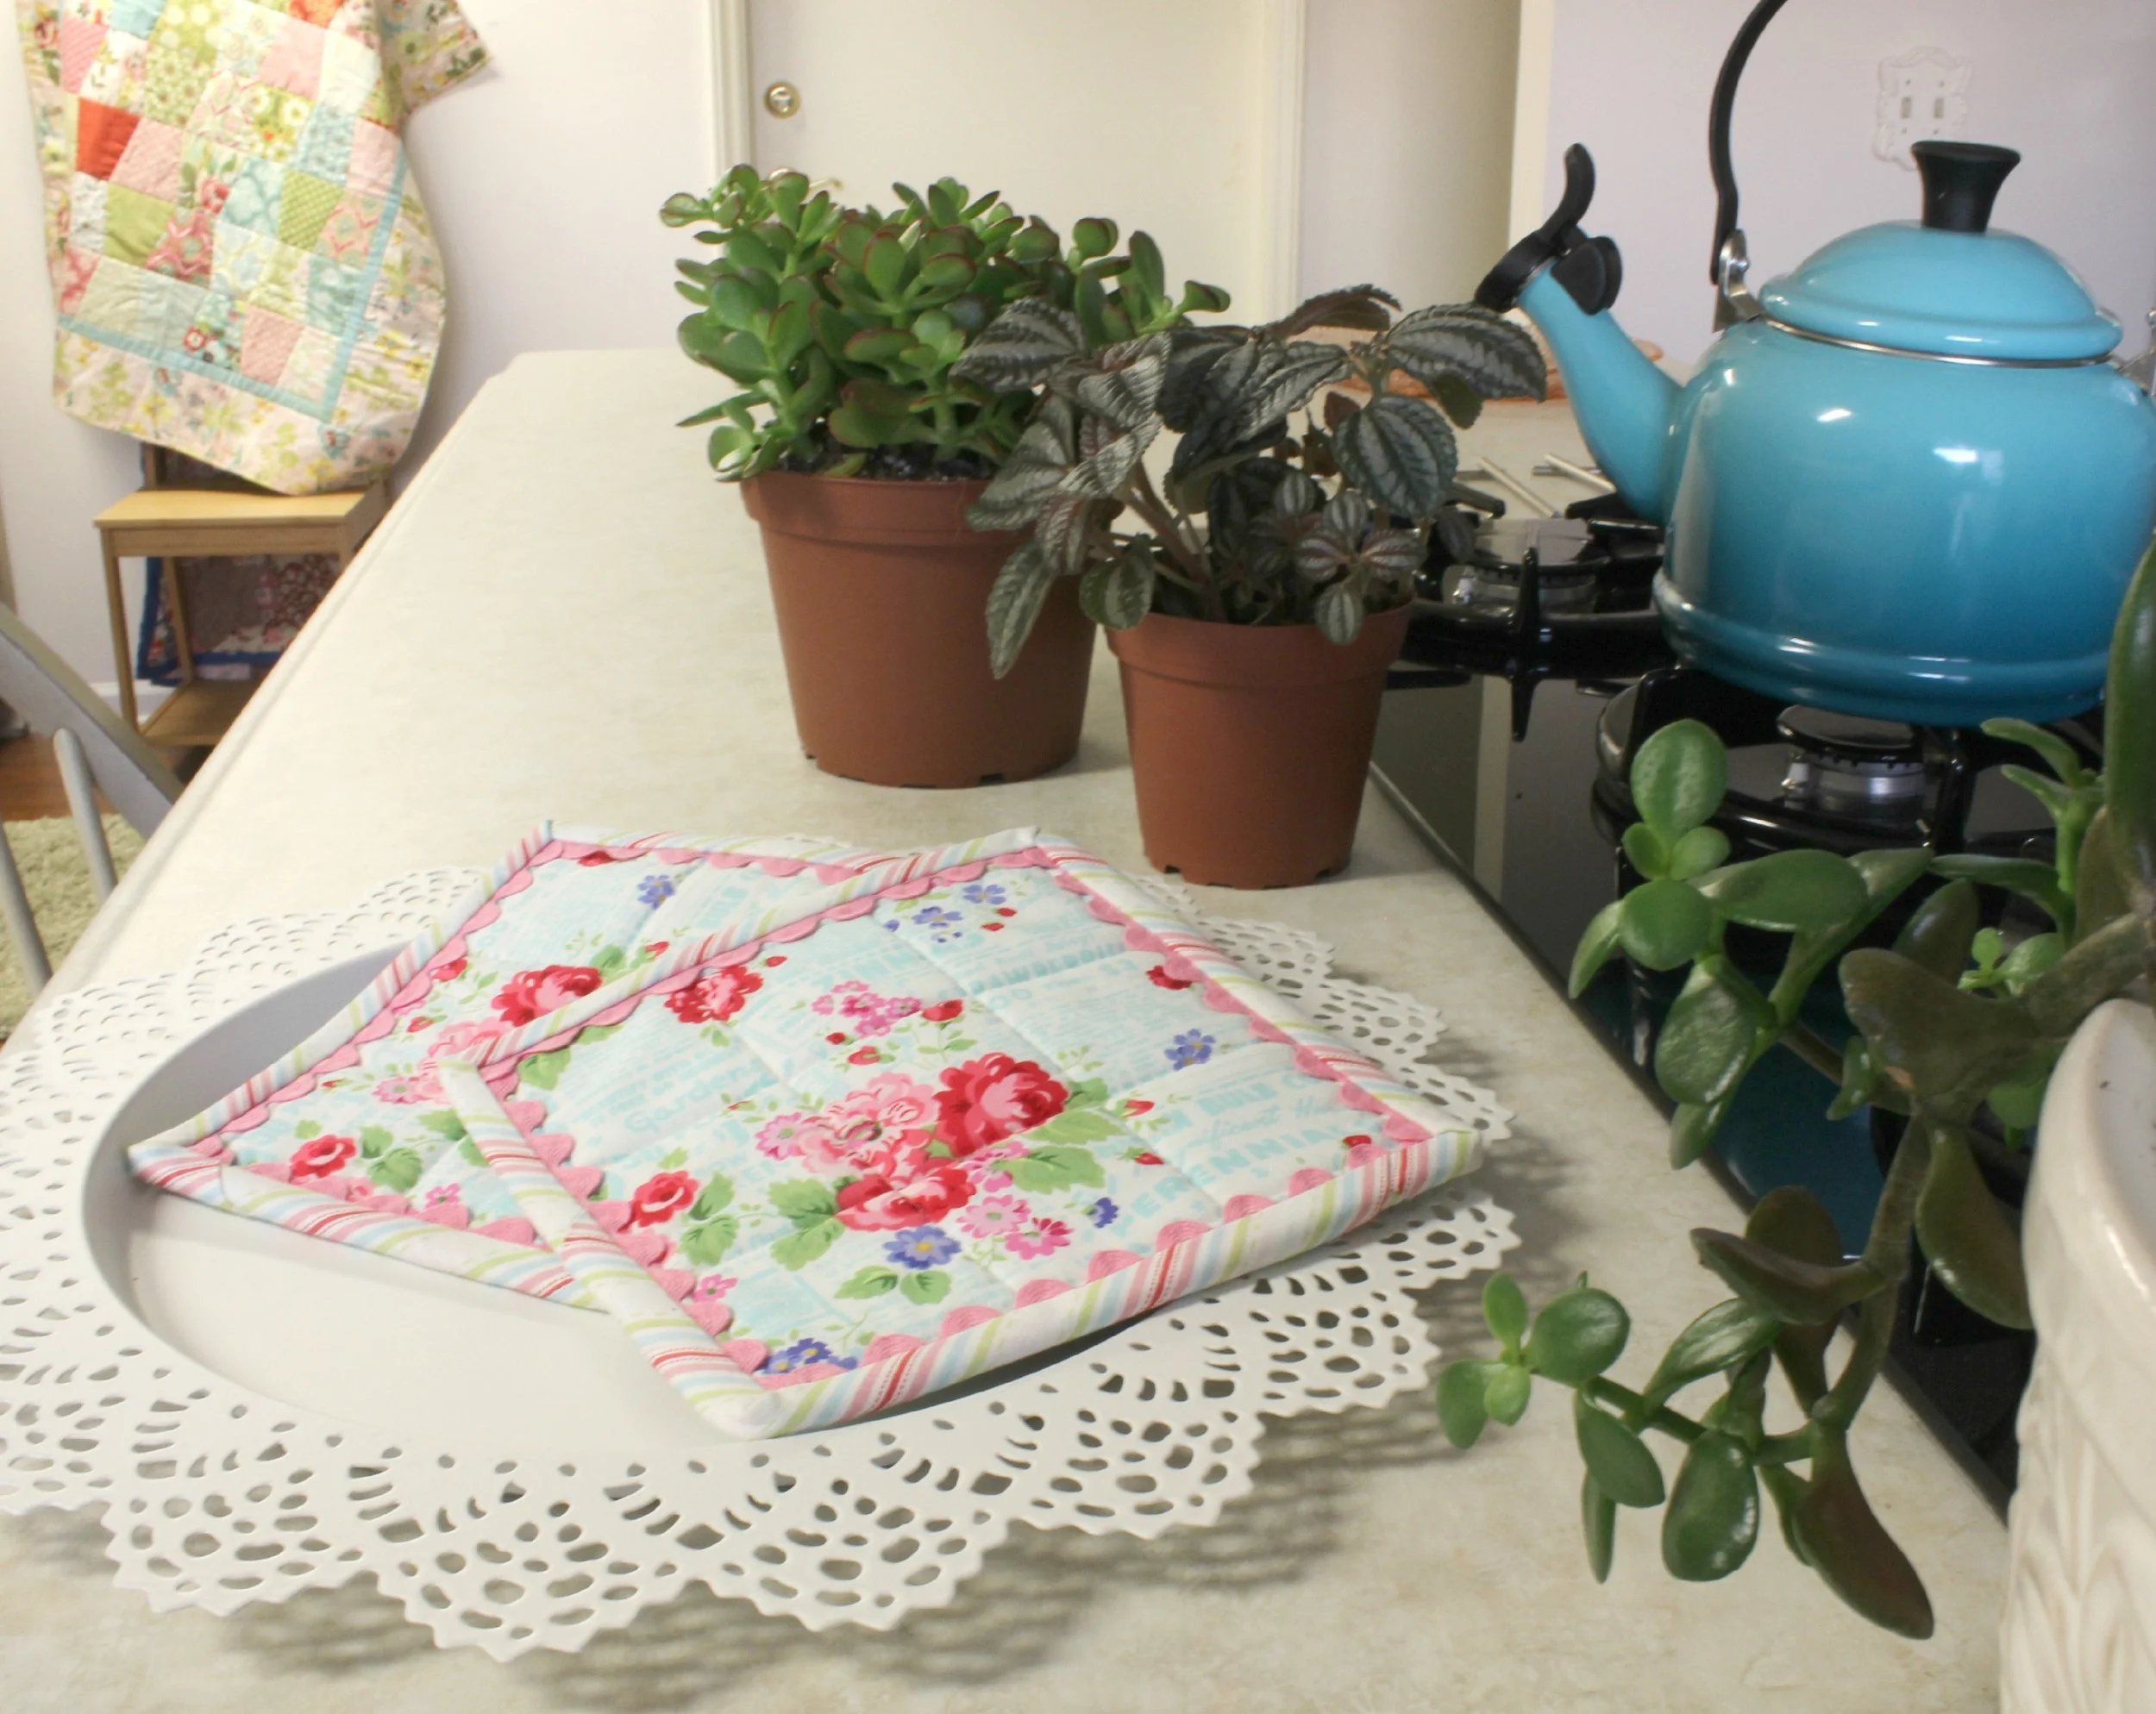
It sure made a sweet little edging on this quilt, and it was so easy to do! (If you need help with bias binding, refer to last Friday's post.) The photos below demonstrate the technique on a pot holder, but it is applied exactly the same on a larger quilt. This ric rac is about 1/2" wide, and fits perfectly in the binding's seam allowance. If you use a different size, just adjust the alignment of the edges (as described below). I use a separate piece for each side so that I don't have to fold it in the corners. This makes for a neater corner with less bulk. Click on the images below to enlarge them.

1. The first photo shows the rick rac placed even with the edge of the quilt. Let the ends extend a bit past each corner; it will be trimmed later. Cover the ric rac with the binding, placing it as you normally would when attaching it to your quilt. I don't find it necessary to pin or baste the ric rac in place, even on a large quilt. A walking foot is helpful. My Baby Lock's belt-driven walking foot (available for several models) does a super job of keeping all the edges even!

2. Stitch in place, stopping every few inches to make sure the ric rac is still sandwiched evenly, and at the edge of the quilt. Stop sewing a little more 1/4" from the end at the corner. This small amount of extra distance is helpful when slipping in the next piece of ric rac, and it doesn't affect the miter.

3. Lift the binding and place another piece of ric rac on the next side, making sure the edges extend past each corner.


4. Miter the binding as you normally would.

5. The ends of the ric rac will extend beyond each corner. After stitching all four sides, trim the ends away, removing as much bulk as you can. Be careful that you don't accidentally cut the binding!

6. The last photo shows the potholder with the ric rac trimmed, the binding attached and ready to flip to the back side.

Flip the binding to the back side, mitering the corners. I love Wonder Clips, do you? I have to admit that I was skeptical at first because I had lived without them for my whole sewing life. Then I used them. Devoted! I use them for holding heavy seams together on things like tote bags and wallets. No pins needed! The back side is flat in order to move smoothly across the bed of your sewing machine. Tip: I keep my favorite needle for stitching binding right in the box of Wonder Clips! Back to the potholder: stitch the binding in place and and your ric rac binding is complete!

Ric Rac Quilt Binding Tutorial

Thanks for visiting! Be sure to sign up for the MaxieMakes email list! Happy sewing and God bless. Maxie


Sew Something You Love, Just for You, Today...

I think this is going to be perfect for me. That's what sewing is all about, right? These colors and fabrics are what I love to work with.

Sew Something you Love

And, with these fabrics, I'm going to show you two of my favorite presser feet for my Baby Lock sewing machine. Chances are good that you can find these feet for your sewing machine, too.

Baby Lock Gathering Foot and Rolled Hemmer Foot

The presser foot on the left is the Gathering foot, and the presser foot on the right is the Narrow Rolled Hemmer. They are both pretty remarkable, and easy enough to use! We'll begin with the Narrow Rolled Hemmer, so let's place that on the machine.

Using the Narrow Rolled Hemmer Presser Foot

I've cut the blue floral print into a strip about 4 1/2" wide, across the width of fabric. I am going to use the narrow rolled hemmer foot to finish both long edges of the strip. In the first picture, above, I have folded the edge over 1/8" two times and pinned it in place to hold the first inch or so. In the middle picture, I am stitching that first inch, very close to the edge of the fold. Next, with the needle in the down position, I lift the presser foot and gently tug the raw edge of the fabric up into the curled opening in the foot. This rolls the edge of the fabric and holds it for stitching. You can see the rolled fabric in place in the last picture. Tip: stitch slowly and watch the folded edge under the needle. If necessary, adjust the needle placement one space to the right.

Finished Rolled Edge

Just look at that very precisely stitched hem! Stitch both long edges. Hem the short ends by folding in 1/2" twice and stitching in place. I like a little deeper hem on the sides, so I don't use the Narrow Hemmer for this step. With a fabric marker that has removable ink (I like this one), draw a line 1" away from the edge on one long side. (Right photo.) This will be the gathering line. Replace the Narrow Hemmer foot with the Gathering foot.

Using the Gathering Foot

Before gathering, a few adjustments need to be made on the machine. First, choose a straight stitch and place the needle in the far left position. Increase your stitch length to about 4 or 5, and increase your tension to almost as high as it will go. I do recommend that you practice on a strip to see that you like the amount of gathers you're achieving, because fabrics of different weights and types gather differently. The longest stitch length and highest tension settings yield the most gathers. Sheer fabrics won't need as high a tension setting as regular weight cotton.

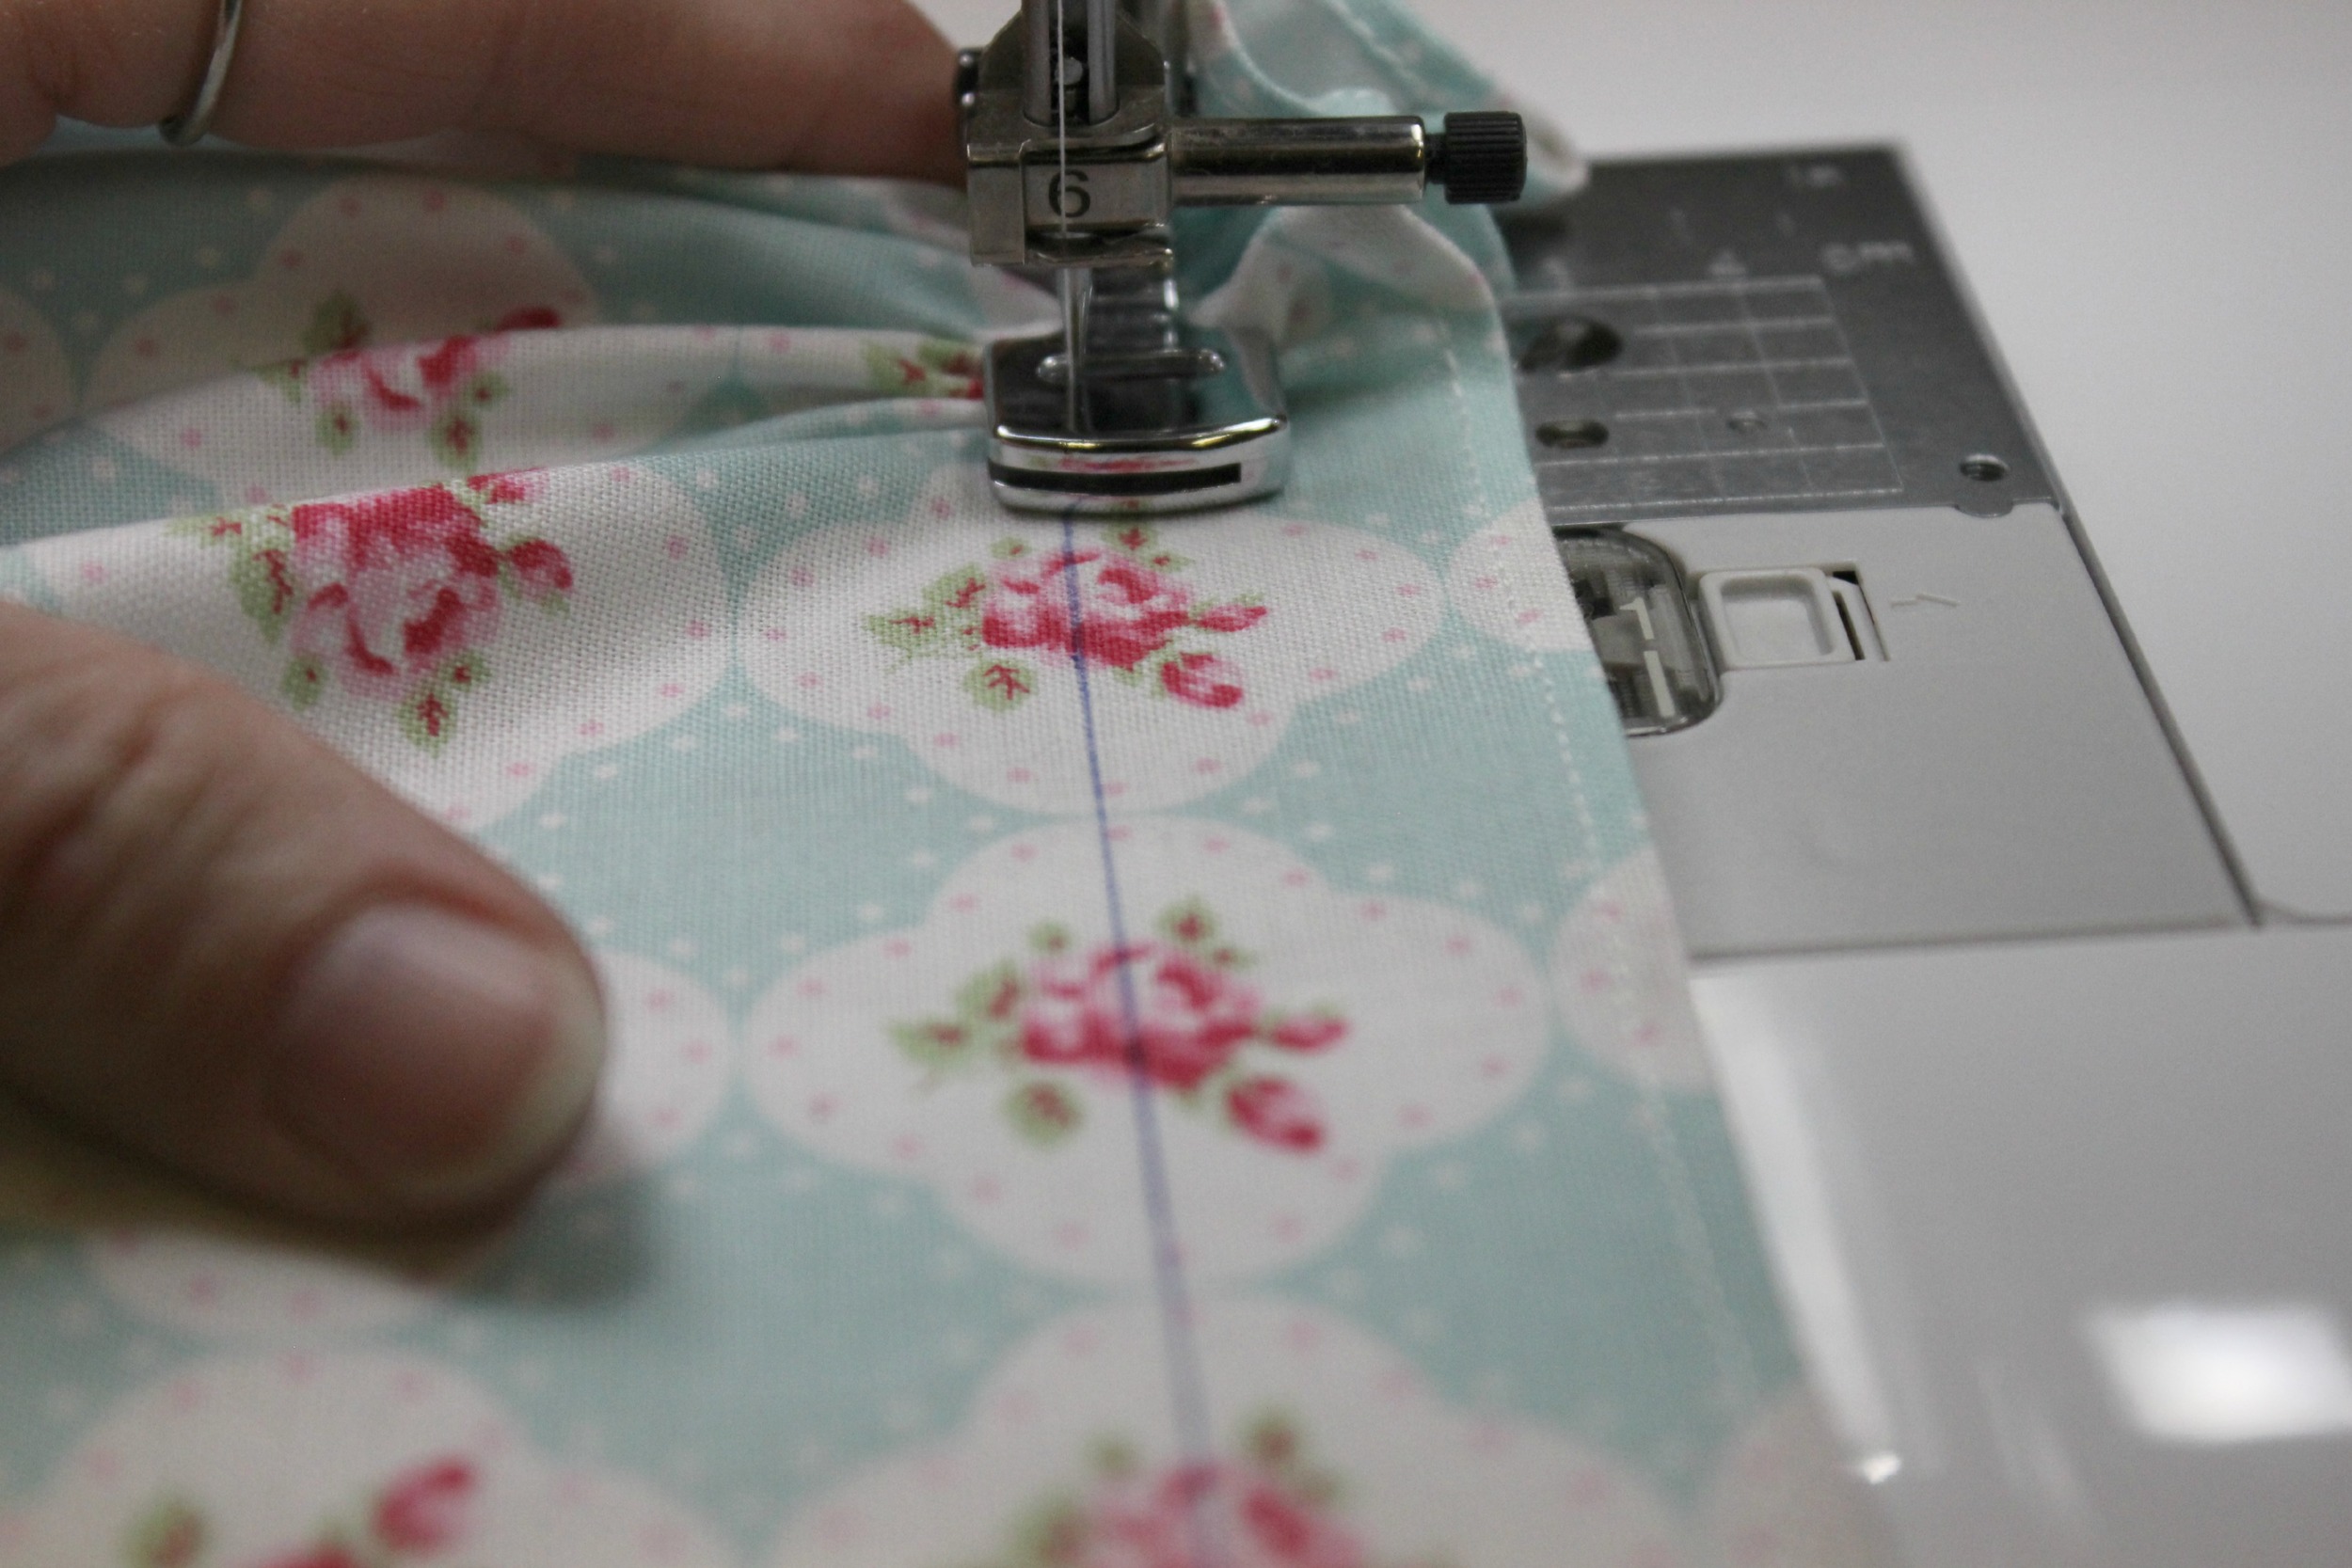
Place the fabric underneath the Gathering foot, right side up. With the needle aligned with the drawn line, begin to stitch. Gathers will magically feed out the back of the presser foot! To increase the amount of gathers, simply place your finger behind the presser foot and hold the fabric against the back of the foot, as shown above. Leave thread tails long enough to allow you to adjust the gathers, if necessary.

Attach the ruffle to the tea towel.

I'm attaching this ruffle to this lovely teal tea towel. Using the fabric marker, draw a line about 2" up from the end. Pin the ruffle in place with the upper hemmed edge on the drawn line. Stitch to the towel on the gathering stitches. Next, I placed rick rack over the gathering stitches and stitched it in place. Finished! It's just perfect for me.

Finished Tea Towel

So, find some fabric and a lovely tea towel that suits your liking and make one that is perfect for yourself. Then enjoy a cup of tea. Thanks for visiting! Happy sewing and God bless! Maxie