How often do you put to use some of those great features on your sewing machine? If you stick with me on a regular basis, I hope to help you begin to use a lot of your machine's special abilities that you might otherwise overlook. One great feature on most machines today is the mirror image. It's obviously needed for certain applications, such as when using the blanket stitch for applique´ and you just need the stitch's jump to work in the opposite direction for you. But what about a straight stitch? Could a mirror image be helpful for a straight stitch? Why, yes! I'll show you how I used it to make the sweet little bag shown in the photo below.
Bag is from Tilda's Summer Ideas, show above.
The mirror image feature does just what the name implies, flipping the stitch or design exactly opposite of the default setting. A scallop stitch that swoops to the right will swoop to the left when the mirror image is activated. That would be very helpful if you were stitching rows of decorative scallops down the front of a blouse and you wanted all the rows to the right of the center line to lay exactly opposite of the rows to the left of the center line. Janice Ferguson Sews has a great picture on her blog of decorative stitches that have been mirrored on the front of a garment. The need to mirror certain stitches is obvious, but let's look at mirroring a straight stitch. Here is the mirror image on the Baby Lock:
When I sew a ribbon on a piece of fabric, I like to stitch both sides in the same direction so that the fabric is not skewed. When stitching straight lines some people stitch one line in one direction and the second in the opposite direction, continually alternating sewing directions to 'even out' the layers. I can usually spot when this is done, because the fabric will slightly skew between the rows of stitching.
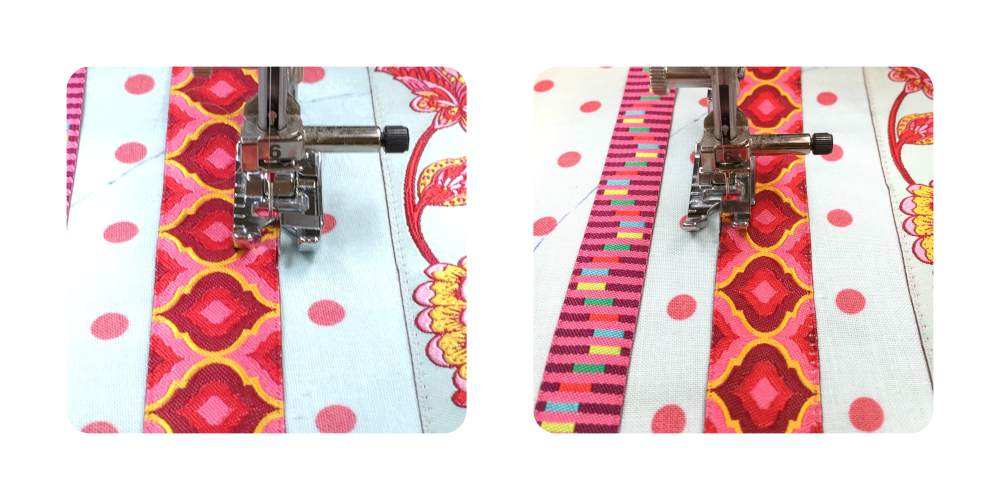
For this project, I used the Edge Joining Foot to stitch along the edge of the ribbon. I set my needle in the position that I wanted, and sewed down one edge (left photo, below). Rather than turn my project and change stitching directions for the other side, I simply touch my mirror image button and slip my fabric over until the other edge of the ribbon is positioned underneath the needle (right photo). Because this foot has a centered metal 'fence' guide, placing the ribbon's edge along the fence assures perfectly aligned stitches! Moving the project and realigning it under the presser foot as before will ensure that both stitching lines will be the same distance from the ribbon's edge, and that no skewing will occur.
Yes, the mirror image works great with your straight stitch when you need to use both sides of the presser foot to guide your stitching lines, both sewn in the same direction! Try it for purse handles, too. Can you share how the mirror image function has helped you?
Thanks for visiting! Happy Sewing and God bless, Maxie


