A Handstitched Rose

Take a break from the sewing machine today. Make something a little more beautiful, with your hands. I'll show you how to make a Spider Web Rose! They are so easy, much easier than they look and they only take a minute to make.

Hand Embroidered Roses

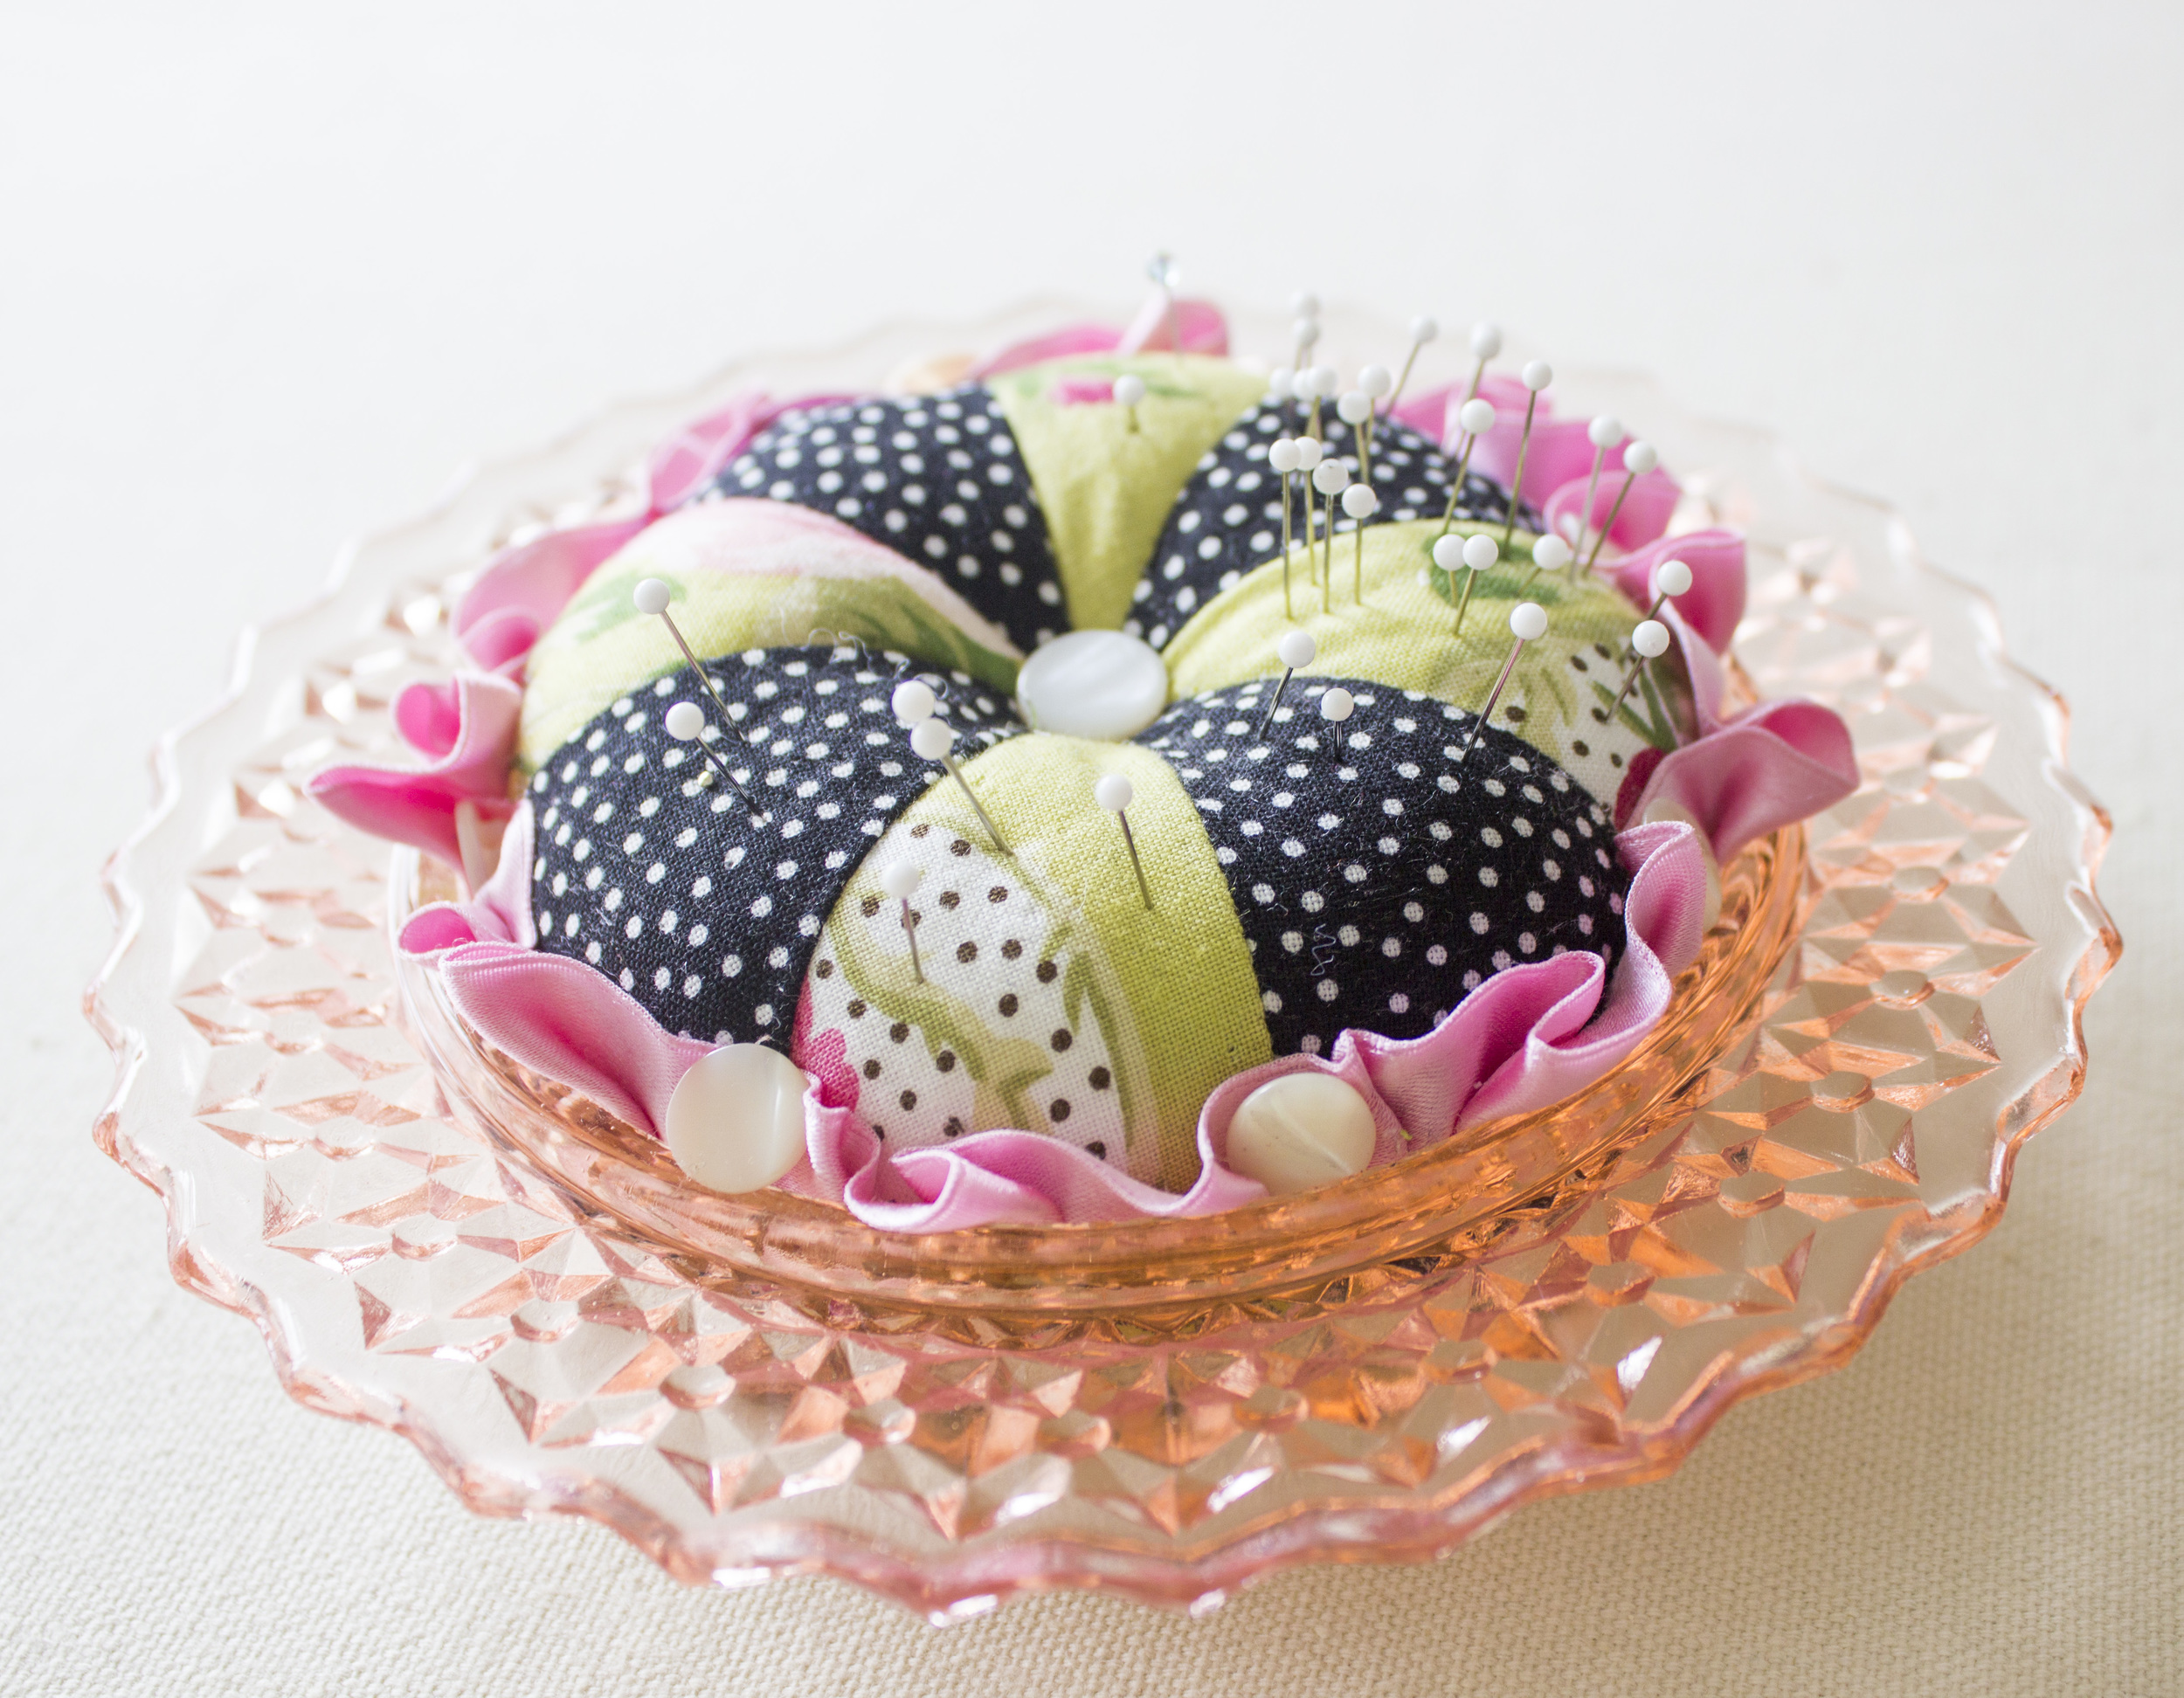
The little bouquet above includes three roses amongst a couple of lazy daisies and french knot hydrangeas. I've made a pincushion, but they would be lovely just about anywhere you wanted to stitch them...on a pocket, a shirt collar, a broach or a pillow (like this one that was my inspiration).

You can stitch these roses with just about any kind of thread or ribbon. Silk ribbon in any width gives wonderful results!

Embroidered roses.

So, let's get started! The first thing is to gather an embroidery needle, floss, matching thread and scissors. Just about any kind of needle with a large eye will do. I'm using a large milliner's needle. Thread it with a thread that matches the embroidery thread or ribbon that you will use for the rose. For instructional purposes, I've used black thread in the photos below.

Flystitsch for embroidered rose.
  • Begin to make a 'Y' shaped stitch by bringing the thread up from the back. Take the needle down again, about 1/4" to the right, and then back up again, forming a triangle with your needle 'stabs' (first photo). Let this last stitch pass through the thread loop (first photo).
  • Take the thread to the back again, forming a 'Y' shape (middle photo).
  • Bring the needle back up at the center of the 'Y'. Make a stitch towards the left, evenly dividing the space between the 'Y' stitches on the left. Repeat for the right side. You should have 5 (fairly) evenly spaced stitches. This is called a 'fly' stitch.
Embroidered Spider Web Rose

Remember that the black thread is to help you visualize the process. I used pink thread in the actual project. 

  • Using all 6 strands of embroidery thread, bring the thread up from the back, center position.
  • Begin to weave the floss around the fly stitch, passing over and under each stitch.
  • Over and under, around and around. Because you used 5 stitches, (an odd number) the weaves will alternate on each stitch.
Spider Web Rose

A Rose is a Rose is a Rose!

Hand Embroidered rose pincushon

Won't you give hand embroidery a try? It's portable, relaxing and rewarding! Thanks for visiting! Happy sewing and God bless. Maxie


Applying Color Wheel Logistics to Quilting

You've seen those Color Wheels hanging on the notions wall in your quilt shop. You may even own one...but do you know how to use it? Recently, at my quilt shop, we had the colorful Lee Monroe of May Chappell visit to teach a Color Study Workshop. The students learned all about color theories and how to apply the lessons learned. The result was more confidence when choosing fabrics, and more beautiful results in their projects!

The colors on the color wheel are identically aligned to the order of colors in the spectrum of light. God designed, color rules apply even to our quilting! Let me point you to a great article at craftsy.com that easily explains how the color wheel can help us. There is even a link in the article for a Craftsy Class by Joen Wolfrom, Color Play for Quilters.

Did you know you can make your own color wheel? Here is my version (thanks to my friendly Sherwin Williams store)!

Make your own color wheel!

Thanks for visiting! Have a colorful, blessed day! Maxie

Prairie Points Revisited

Want an alternative to adding binding to your quilt? How about Prairie Points? Wait...don't touch that dial! They are really easy to do with a continuous method! I have a quick video tutorial, below, that will show you start to finish. And look how beautifully they finish your quilt:

Prairie Points on the edge of a quilt.
Prairie Points on a Quilt
Prairie Points finish the edge of a quilt.


I made this video about 3 years ago, so the quality is of my own doing! Having said that, it still gets the job done and will show you how to easily and quickly make continuous prairie points for a beautiful change from binding! There is a special (expensive) ruler out there for this technique, but if you follow my directions you won't need it! (Note: I no longer offer the kits mentioned in the video.) Enjoy!

Thanks for visiting! Happy sewing and God bless! Maxie

Pins 101

How the internet changes things. Even our vocabulary, right? Take the word pin. To a quilter, it's a very important sewing notion. To someone perusing the internet, it's an image uploaded to the photo sharing website, Pinterest. Users can upload, save, sort, and manage images—known as pins—and other media content (e.g., videos and images) through collections known as pinboards. I have pinboards on Pinterest, and I invite you to follow Maxie Makes there! (And, by all means, please feel free to pin images from my blog!) But for a moment, let's talk about a quilter's pin!

Hand Made Pincushion in Depression Glass Dish

This little pincushion is filled with my very favorite pin, made by Collins. (I'll tell you how to make the pincushion below!) They are very fine nickel plated, with glass heads. Did you know that some pins have plastic heads? This can be disastrous if you accidentally iron over one. I know. I tossed out my plastic pins long ago and began the search for the perfect glass head pin. After a lot of trials, I finally settled on this pin and it's been my favorite for years. It's very fine, yet strong enough to remain straight when I need to use it as a tool of sorts. They are 1 3/8" long, which seems perfect when pinning everything from quilt squares to clothing to home dec and tote bags. My favorite. But not Judy's.

Judy is a long time employee at my quilt shop, and a very excellent quilter and teacher. She does a lot of paper piecing, and when it comes to meticulous piecing, she's scrupulous. Her favorite pin is Clover's Fine Patchwork Pin because they are a little longer (1.41") and a wee bit thinner. She feels the size of the pin allows her to pin with greater accuracy. However, the wee bit thinner-ness causes it to bend more easily, and that's why I choose the Collins pin. Judy obviously doesn't use her pins as tools, as I do, so these just fit her criteria better.

pins.png

My pins are on the left, Judy's on the right.

So...you choose for yourself your favorite pin! How about making two of these beautiful pin cushions, one for each kind! I have both listed on my shopping page.

Hand Made Pin Cushion in a Depression Glass Dish


How to make the Pin Cushion:

This pin cushion was made in a depression glass dish. I do have the lid for it, but I usually don't cover my pins, so if you find a deal in an antique shop just because the lid is missing or broken...grab it! The fabric section is simply a pinwheel block, made from four half square triangles, and trimmed into a circle. I stitched very long stitches around the outside edge of the circle so that I could gather the edge, and I left the needle and thread attached. Add a handful of stuffing (I love to use left over wool batting scraps for this) and pull up the gathering threads a bit. Stitch across the circle to secure and tie off. Sew a button through the center to depress the center a bit. Next, I covered a cardboard circle with matching fabric and placed it in the bottom of the dish, with the pretty fabric facing down. (This is only necessary if your dish is transparent.) Then, after gluing pink gathered ribbon to the edge of the pinwheel pouf, I glued it into the dish with a glue gun. Have fun!

Thanks for visiting and happy sewing! God bless, Maxie

Sew Together Bag

I promised myself a long time ago that I'd make myself a Sew Together Bag. This was the most adorable and useful bag I'd seen in a while. Then I stumbled upon Sew Demented's booth at Quilt Market last fall and, once again, was faced with the fact that I hadn't yet kept my promise. So I ordered the patterns and resolved to make it when I returned home.

Patterns arrived, plans made, fabric cut, supplies collected. And finally...my bag became a reality!

Sew Together Bag

Isn't it fun? The pattern allows total freedom to design the outside of your bag. (More about that below.) I chose to use several linen fabrics from Moda and one linen from Cotton and Steel (the kitty). I embellished it with Bonnie Christine's ribbon on both sides. And as great as the outside is, have a look inside!

Filled Sew Together Bag

Look how much can fit into this little lovely thing! I had to just stop looking for things to put inside for the picture; I couldn't fill it up! Notice the little pin cushion on one side and the needle keeper on the other. Seven pockets in all!

Empty Sew Together Bag

What would you put inside? Maybe you would leave the pin cushion and needle keeper off and use it for makeup. Here are a few pictures of the bag under construction.

Assembling the pockets for the Sew Together Bag

There are four pocket pieces with zippers sewn between them. Some scraps of Bonnie Christine's fabrics worked well! I don't know how it came together; I just followed the easy steps and suddenly pockets appeared. Smart pattern designer.

Sew Together Bag Components

Pictured above are the inside pocket assembly, the outer bag, and the end pocket sides.

Attaching the pockets in the Sew Together Bag

This is how the pocket assembly looks when ready to attach to the outer bag.

Pretty Sew Together Bag

I'm so glad I didn't break my promise to make this bag! Want to see other versions? Check out this google search of images for the Sew Together Bag! Make a promise to yourself today to make one for yourself! You'll find the pattern on my shopping page.

Thanks for visiting! Happy Sewing and God bless! Maxie