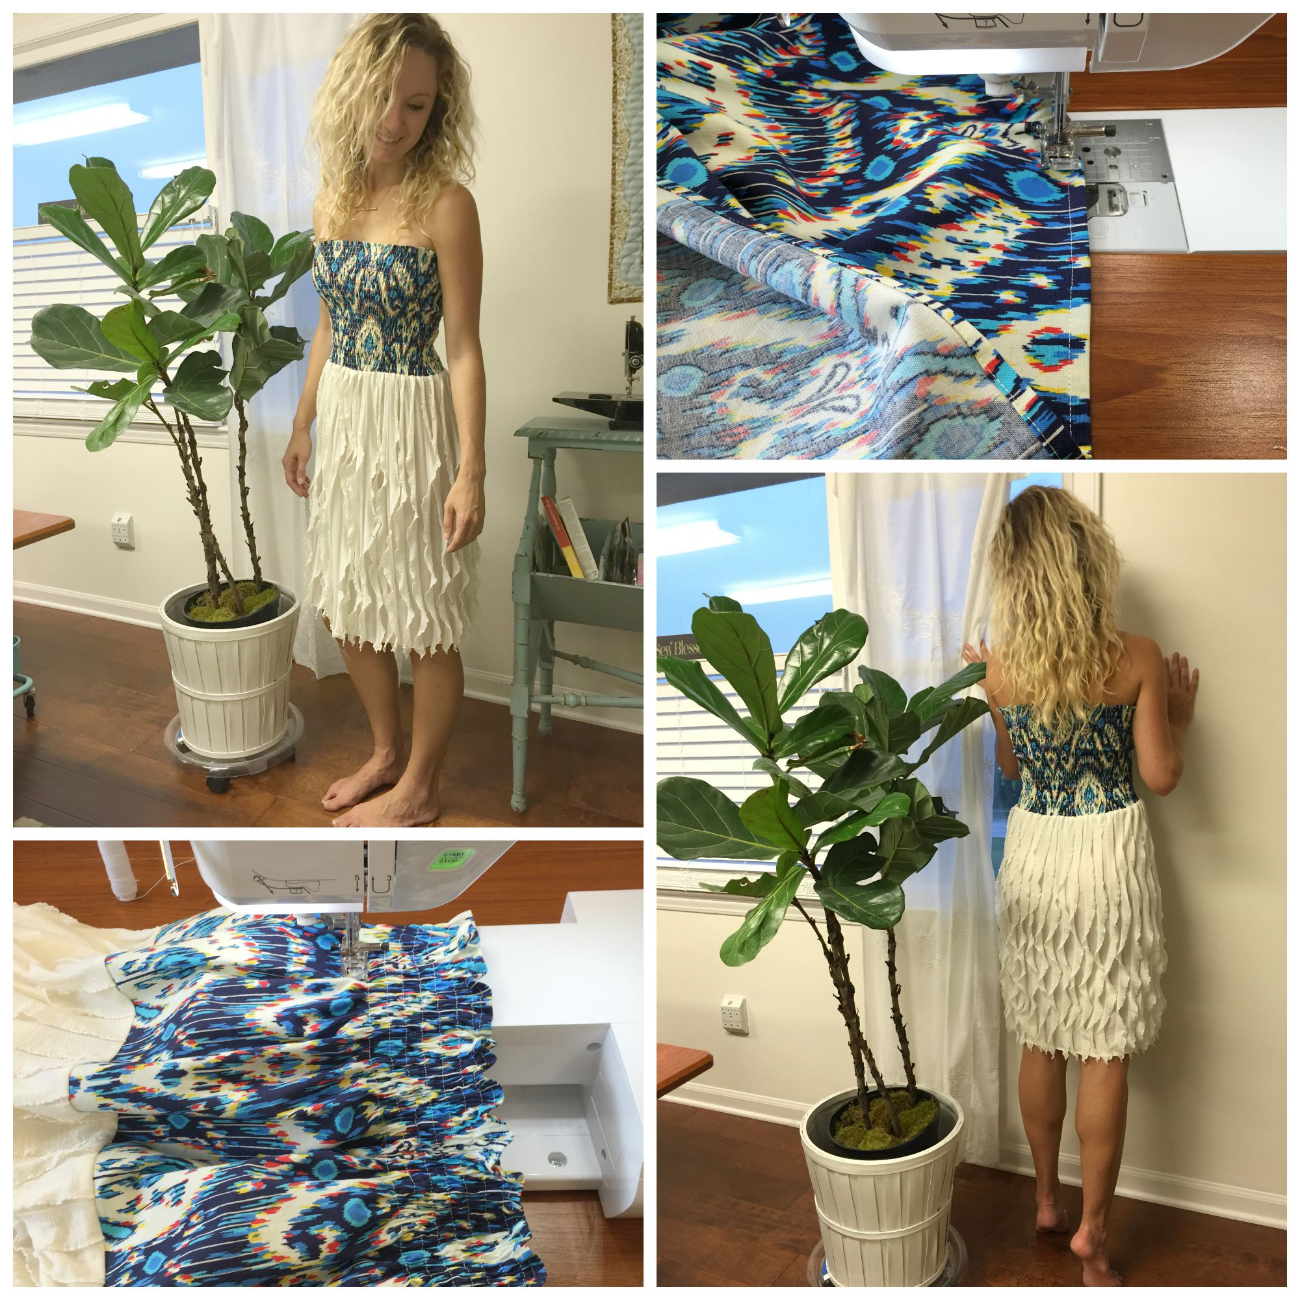
Today I'm sharing about shirring with a how-to and a little video! My daughter, Becky, wanted me to make a little sundress for her beach vacation, so I set her free in my fabric shop to choose her fabrics! She chose a white ruffle fabric for the skirt (it comes pre-ruffled right on the bolt!), and an Amy Butler cotton print for the top (bodice).
For the bodice, I simply made a tube about 12" long and 10" wider than Becky's bust measurement. Next, I hemmed the top edge by pressing under 1/4" twice and top stitching around the folded edge. Based on Becky's measurement, the finished bodice needed to be about 10" long. I serged around the lower edge so that the tube was 10 1/2" long, giving me 1/2" for a seam allowance to attach it to the skirt.
For the skirt, I purchased enough fabric to attach it to the lower bodice edge, (purchase half of the bodice width, plus extra for a side seam on each side). The selvages will become the skirt's hem, and the cut edges will become the side seams. This ruffle fabric is 60" wide, and since Becky's skirt needed to be 21" long, that meant removing a piece of the center fold about 18" wide (and saving it for another project!). Sew up the side seams and attach the skirt to the bodice with 1/2" seam allowance.
Shirring is simple. Just hand-wind elastic thread onto a bobbin, being careful not to stretch it as you wind. Place the bobbin in your bobbin case as with normal thread, including passing it into the tension slots. Lengthen your stitch length to about 4.0 and you're ready to go! Back-stitch at the beginning and ending of your seam to ensure that the elastic stays in place. Working with a tube is very easily done by using the free arm feature on your sewing machine and sewing the elastic rows in a spiral, about 1/2" apart. When the first round is almost completed, just taper your stitching line so that it stitches 1/2" below the beginning point. Continue sewing around the tube in a constant spiral, ending when you reach the seam that joins the skirt to the bodice. Keeping an index finger pressed against the back of the presser foot while stitching will yield more gathers in the fabric. After the stitching is complete, steam the shirring with a steam iron for a few seconds to add additional gathers to the elastic! The video, above, shows how that shirring process looks. Give it a try!
Thanks for visiting! Happy Sewing and God bless! Maxie


