
Why is the last task of a project sometimes the most dreaded? For me, I think it's because I want to be finished and on to the next thing! Sewing buttons on a hand made garment is usually my last task and discovering that I could attach them with my sewing machine was an "Aha!" moment! I'll show you how easily it's done in the video below, but first, let's make the buttonhole!
When I demo the great features of the Baby Lock sewing machines at my fabric store, one of the most frequent statements I hear is, "Oh, I don't do buttonholes!". I love seeing the customer do a complete reversal during their owner's training! The supplies for a successful buttonhole are shown below:

You'll need to gather a small piece of tear-away stabilizer for each buttonhole, the buttons, your buttonhole foot (the larger foot shown above), and the foot for attaching your buttons to your fabric. Tip: I prefer to use cotton threads for making buttonholes because they always stitch nicer than polyester.
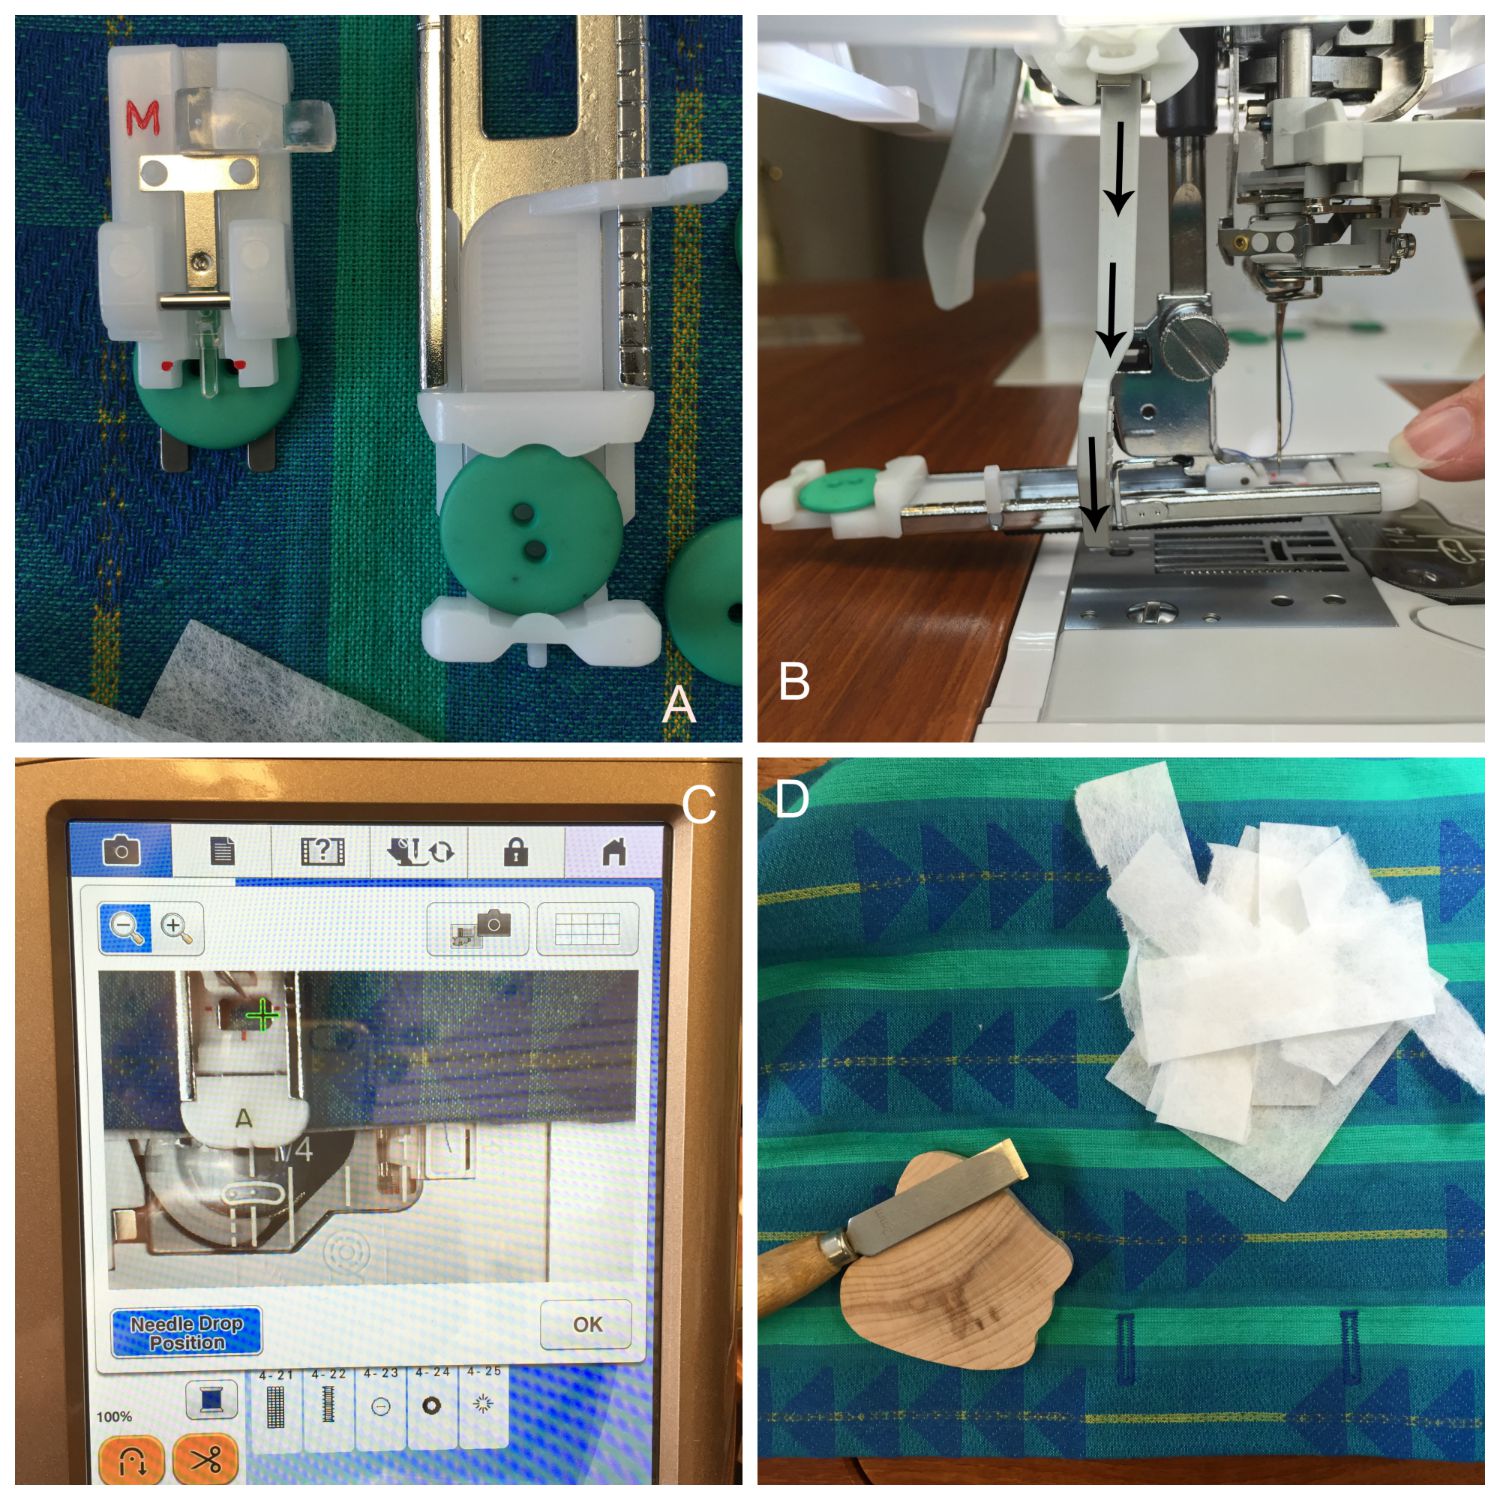
Photo A: I love the buttonhole foot (the larger foot on the right) for my Baby Lock machine because you simply drop the button in the back of the foot, slide the back tab until it rests against the button and you're ready to stitch a buttonhole perfectly sized for your button! I am choosing a simple rectangular shaped buttonhole for my button, but there are other styles in the menu that are suited to shank buttons, knit fabrics and more! The smaller foot on the left is used for attaching the button to the fabric. It snugly holds the button in place during stitching. See my video below!
Photo B: The buttonhole foot is attached to the machine. On my machine, I pull down the buttonhole lever, which rests against a tab on the foot.
Photo C: Placement is extra easy when I use the camera feature on my Destiny machine. I get a 'Needle-eye' view of placement! Don't forget to slip a little piece of stabilizer underneath the fabric. Tip: When sewing buttonholes on thicker fabrics (wool, fleece, etc.) I also place a wash-away stabilizer on the top side.
Photo D: After the buttonholes are made, I remove the stabilizer from the back side and I use my Buttonhole cutter to safely & neatly open them. Tip: Run a bead of Fray Check through the center of the buttonhole before cutting and there will never be any unraveled threads!
And last of all...blissfully (and quickly) sew the buttons in place!
Thanks for visiting today! Happy Sewing and God bless. Maxie
