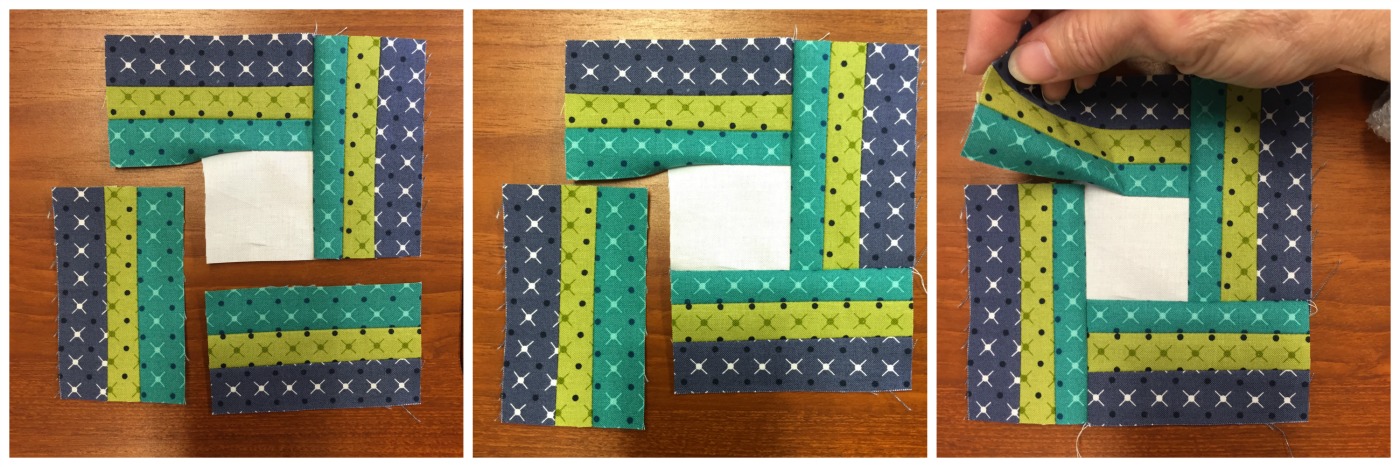
There are some types of quilt blocks that some of us avoid because we believe they are harder than usual, right? I've written about 'Y' seams with tumbling blocks and hexagons and I hope you've given those a try. Today I want to take the mystery out of another technique: the 'Partial Seam'. I'll break it down into each individual step and I know you'll see that it's really a piece of cake!
Here are the patches, laid out as they will be sewn together. As you can see, the seam lines don't line up straight across the block as they would in, say, a nine patch block. What to do?
In the first photo, I've flipped the white square up on the strip unit, right sides together. Taking that unit to the sewing machine, I've sewn about half way down the side of the white square (middle photo). Open it out and place it back in position.
The next unit to sew in place is the unit on the right side of the white square (shown above in the first photo). The third unit to sew in place will be the bottom unit (middle photo). The last unit to sew in place will be the left unit. Fold the unsewn portion of the top unit out of the way so that the last unit can lie flat against the white square's edge.
Now, there is only one last step!
Fold the block so that the edges of the unsewn sections are right sides together. Stitch the remaining portion of the seam, overlapping the beginning stitches (on the white block in the first photo) just a tad. Press your seams and you're done! Now all your friends will say, "How'd she do that?"
Thanks for visiting! Happy sewing and God bless! Maxie


