Hexagon Rainbow Quilt

Our local Modern Quilt Guild offers a challenge each month and last month they decided it was time for an Alison Glass Ex Libris challenge. One of Alison's prints included a circular rainbow colored menagerie of florals and insects, and it was this print that was chosen by the guild to use as the challenge fabric.

Hexagon Rainbow Quilt with Alison Glass Fabric

I posted in a former blog post about how my no-baste method for making the hexagons. The fabrics used are Modern Solids from In the Beginning Fabrics for the hexies, using a precut collection of 5" strips that included all but two of the colors I needed.

Alison Glass' Ex Libris Fabric is center stage for this Hexagon Rainbow Quilt.

The hexagons are hand applique´d in the border (which is, by the way, Jen Kingwell's fabric) and placed close to the corresponding color in the Alison Glass print.

For the quilting, I chose to echo quilt in a hexagon shape, which was a little more challenging than the circular design I had originally thought of stitching. First, I traced the hexagon paper used to make the hexagons in the center of the quilt. In order to pivot at each angle correctly, I drew three straight lines that intersected in the center and ran through the angles of the hexagon. In the photo below, the lines are highlighted in white.

Finding pivot points to echo quilt a hexagon shape.

Stitch the center hexagon first, then begin to angle, or taper, your stitching line to reach your desired distance between rows. (After the first or second go-around, you won't need to taper your stitches.) When you reach a drawn line, lift your presser foot and pivot, lining up the stitch path with the side of the hexagon. You can see my blue marker line in the three photos below.  Raise your foot and pivot every time you reach a drawn line!

Guess what? My Baby Lock's guide beam helped me tremendously with this task! In the video below you can see that the red beam of light tracks directly in front of the needle, making it easy to stitch straight and evenly! I love the look of hand guided quilting, so I didn't really care for all my lines to be exactly the same distance apart. (Didn't want you judging me on that...)  The pivot lines make the overall effect pleasing, so I'm happy!

When quilting angles, drawing pivot lines is important, and works with any shape you need to echo! Try it the next time you want to quilt something a little more challenging than a circle!

EX Libris Rainbow Hexagon Quilt

I took all the pictures of this little quilt at my daughter, Becky's, house. She had so many neat vignettes that I couldn't decide which pictures to use, so I used them all!

Hexagon Rainbow Quilt

Thanks for visiting! Happy Sewing and God bless! Maxie

Padded Ribbon Key Fob

Sometimes I just need a nice little project that I can finish in.....say, 10 minutes. Sometimes I need a little gift in a hurry. Sometimes I need to take a break from that quilt I've been working on for six months and actually finish something. I think I have just the ticket.

Working with beautiful textures and textiles always lifts my spirit, and this project is a delight because it includes a little bit of luxurious ribbon from Renaissance Ribbons! And because the end result is something that everyone needs, (whether you're gifting yourself or someone else), it will long be appreciated for both its usefulness and beauty.

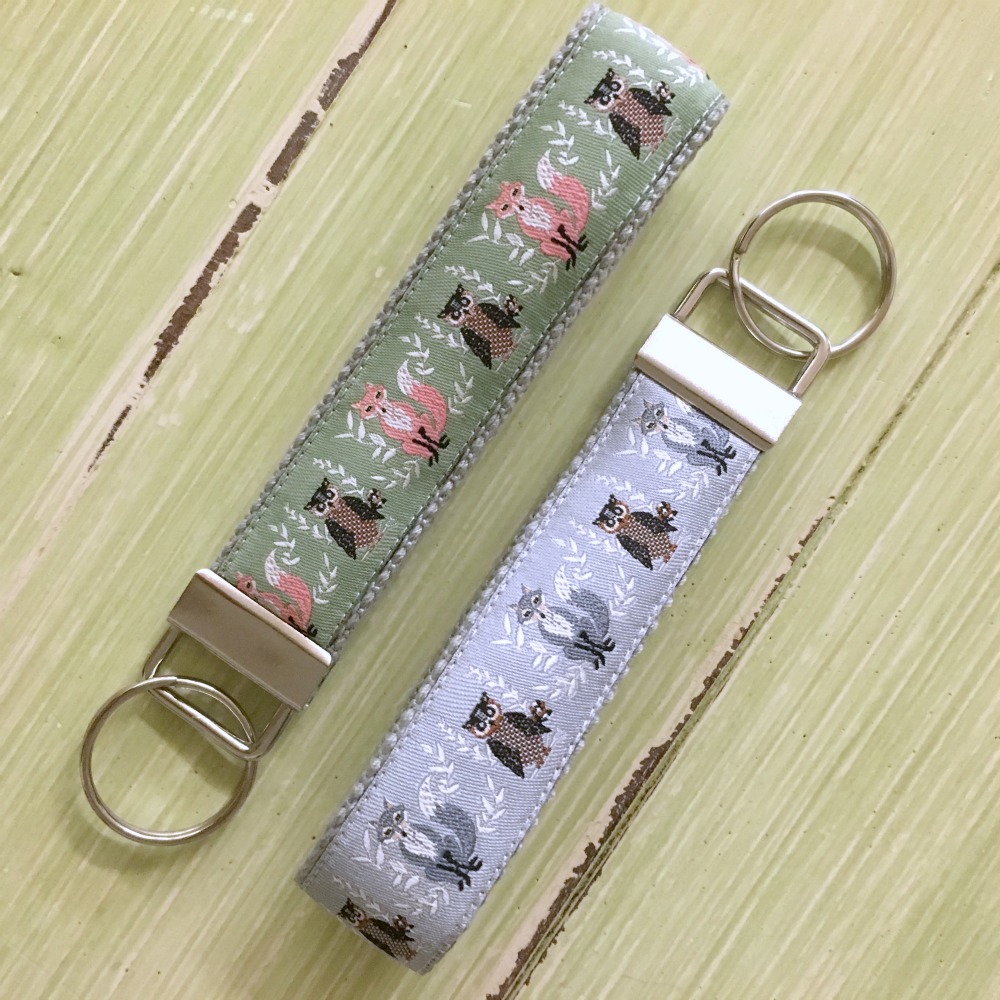
Padded Ribbon Key Fob

The two ribbons used above are from Bonnie Christine's designs for Renaissance Ribbon.  Because they coordinate with her Hello, Bear fabrics, you may recognize the sweet little fox and owl. I have several of these key fobs and they are so great because the ribbon is easy to find in my purse and I can wear it like a bracelet when I need to keep up with my keys.

  • Supplies:
  • 9" braid trim a bit wider than your ribbon. I used a 1" wide braid.
  • 9" ribbon
  • matching thread
  • BInding clips or pins
  • Key Fob Hardware Set
Supplies for Ribbon Key Fob

Assembly:

  •  Lay ribbon on top of the braid, centered. Hold in place with binding clips or pins.
  • The Edge Joining Foot from Baby Lock makes it so easy to sew straight along the edge of projects. See the fabric guide in the first photo, below? In the second photo you can see how the guide is placed next to the stitching edge, keeping your stitches on the straight and narrow!
Baby Lock's Edge Sewing Foot

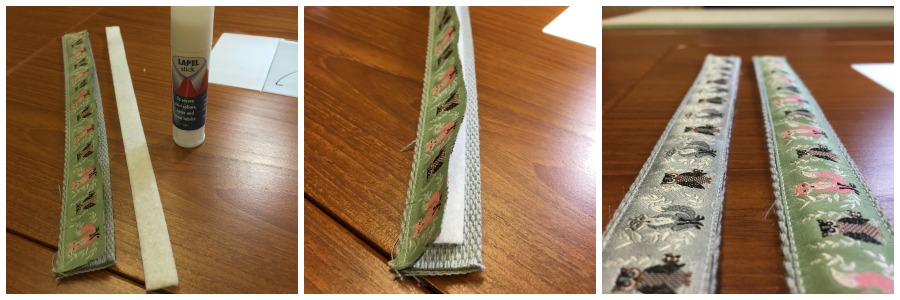
I've made too many of these to count, but this green one gave me a new idea. I decided to try to slip a 1/2" strip of batting inside, between the ribbon and the braid. To do so, I sewed one long edge of the ribbon to the braid and lifted the unsewn edge and placed the batting inside (center photo, below). I used a glue stick to hold the batting in place. Next, I stitched the remaining long edge to the braid. The grey ribbon, (shown left in the far right photo, below) is unpadded, the green is padded. The padding adds an extra layer of special-ness to this special ribbon!

Padding the Key Fob

After stitching both sides of the ribbon, stitch across the short ends to secure. You'll need a key fob hardware set to complete your project. The optional pliers simplify things and press the clamp smoothly together (first photo, below) Simply fold the ribbon/braid in half and place the short ends inside the hardware clamp (middle photo, below). Give the clamp a good press (third photo, below). Add your split ring and you're done! At least, with your first one! Hardware,  Hello, Bear Ribbons and braid aren't listed on my website, but are available at my quilt shop, if you'd like to call! 828 524-3300. See other available ribbons by Bonnie Christine here.

Hardware and tools for making a key fob.

Thanks for visiting. Happy Sewing and God bless!  Maxie

Sewing No-Baste Hexies

Hexies are everywhere in the quilting world. While certainly not a new idea, the Modern Quilt Movement has breathed new life into this time-honored little patch.

Allison Glass and Hexies

Grandmother's Flower Garden would stand up and cheer, seeing all the innovative ways these six sided scraps are being used. So, when our local Modern Quilt Guild challenged us with this lovely Allison Glass print, I thought a rainbow of hexies would mix nicely with it!

Most quilters are familiar with the English Paper Piecing method of wrapping fabric around hexagon papers, hand basting the fabric from the back side to hold it to the paper. The hexagons are then stitched together by hand. But I wanted to individually applique´my hexagons around Allison's circular rainbow, and I wanted to skip the hand basting. So, here is my no-baste method of making hexagons:

For this method, I use a spray starch alternative. My favorite is a product called 'Flatter'. It has no fabric protectants, no starch, is plant derived and non-toxic. Spray a small amount into a dish and get a paint brush handy. Center a hexagon paper on the wrong side of your hexagon fabric (I cut it into shape by holding the paper on top of the fabric and roughly cut a hexagon shape around it, leaving a good 1/4" seam allowance around the edges of the paper. (First photo.)

Next, using the paint brush, lightly brush 'Flatter' onto the seam allowance of the fabric. Let it soak into the seam allowance of the fabric, making sure the area that will fold over the paper edge is wet. (Center photo.)

Press all six edges over the paper, working around the hexagon one side at a time. (Third photo.)

Finishing the Hexie

The first photo, above, shows all six sides crisply pressed toward the back side of the hexie. The second photo shows the hexie from the front side. Press well.

The last step is to pin in place on your background fabric. I found the 'Flatter' spray starch made the fabric crisp enough to remove the paper before stitching to the background. I just pinned in place and hand stitched the folded edge of the hexagon to the background (machine stitching with your favorite method would also be nice). Alternately, you may leave the papers inside for this step; after the hexie is stitched in place, make a slit in the background fabric (underneath the hexie) and slip the paper out.

I'll show you the finished project in my next blog post, so please visit again on Friday!

Thanks for stopping by. Happy sewing and God bless! Maxie
How to Make a Christmas Stocking...Extra Special!

As Thanksgiving approaches, the onset of Christmas Spirit commences. Let the Christmas sewing begin!

How to make a Christmas Stocking!

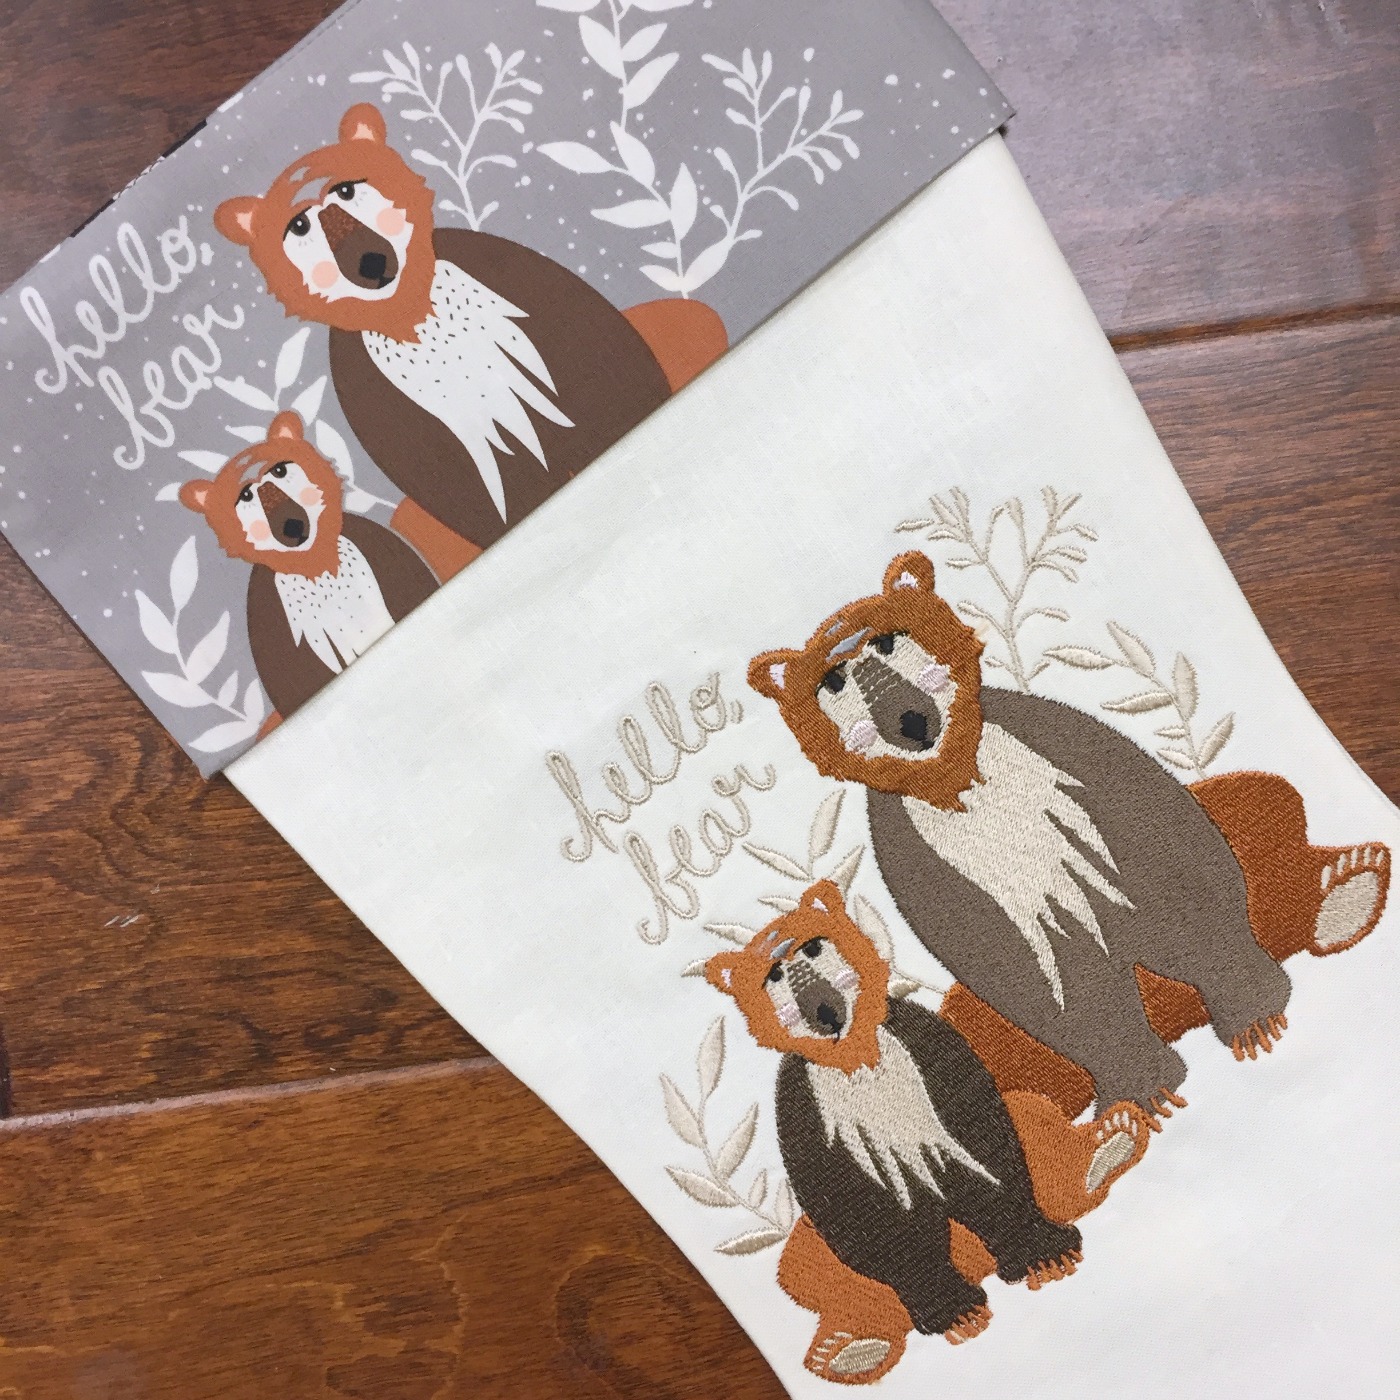
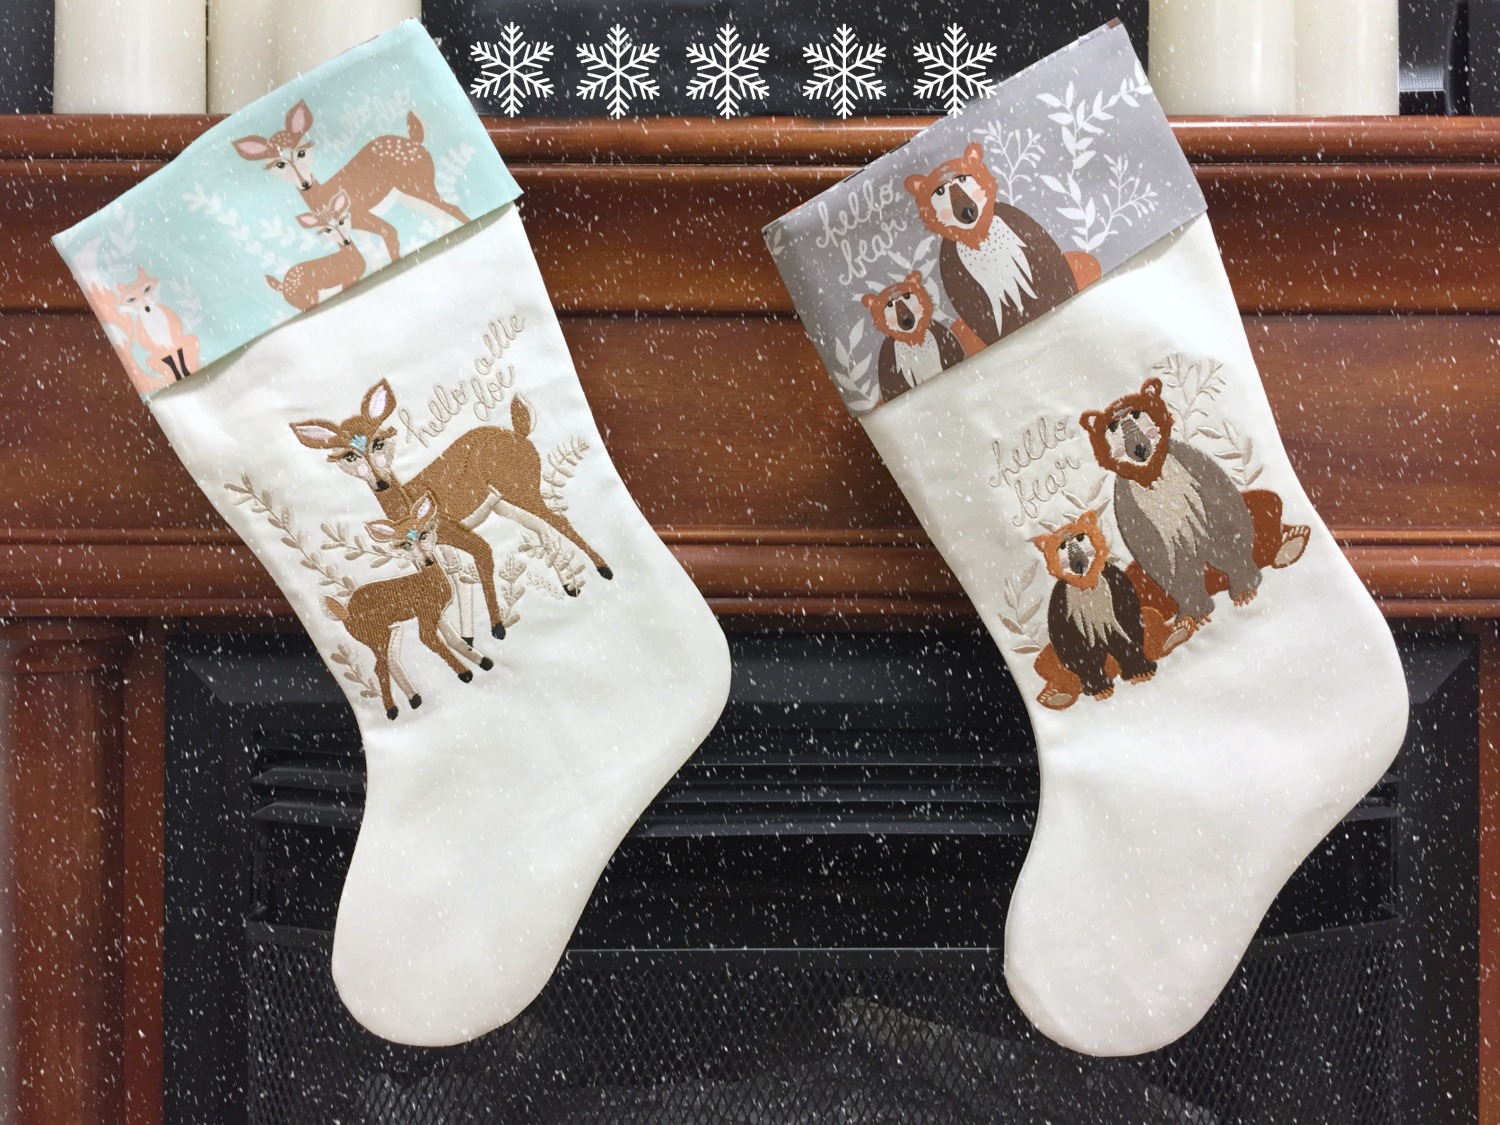
I made these two stockings for my grandchildren, Ollie Doe and Bear. You may recognize that the fabric for the cuff is from Bonnie Christine's fabric line for Art Gallery Fabrics, Hello, Bear. There happens to be a doe in the fabric, so by adding Ollie's name to the embroidery design I was able to personalize her stocking, too! I posted last week about Bonnie's coordinating machine embroidery designs for the new app, Acudesign, from which I chose the Bear and the Doe to make their stockings. Whether you choose to embroider a design on your stocking, or applique´, use patchwork or plain fabric, you can follow these simple directions to make a stocking extra special for your special someone!

First of all, draw a stocking shape on your pattern paper. Trace another stocking or create an original shape; stockings come in all shapes and sizes! I used a basic shape from a great little pattern by Sharon Hollifield, who teaches occasionally at my shop (if you'd like to order her pattern, just send me an email).

  • Trace the design onto your stocking front fabric. If you are planning to embellish in any way, don't cut it out yet. Embellish as desired first, within your drawn stocking line.
  • After embellishing, cut out your stocking front and another plain stocking for the back. Make sure they match when placed right sides together.
  • Cut two lining pieces the same size.
  • For the cuff, cut two pieces the width of your stocking top by 8". My stocking piece measured 9" across the top edge, so I cut two cuff rectangles, each 9" wide and 8" deep. If your fabric is directional, as mine, keep in mind that the top half of the cuff rectangle will be folded down to the front outside (the center line of the cuff will become the lower edge of the cuff). I was able to plan a bit of the deer and the bear to be placed in just the right spot. Get creative with your cuff...use faux fur, leather, corduroy, satin, an old sweater, etc.
  • With right sides together, stitch the front cuff to the front stocking. The photo below shows the cuff sections stitched to the stocking front and back, and the lining pieces are laid in place. This photo also shows why a separate cuff is needed for directional prints! Had they been cut from one piece of fabric, either the cuff or the lining would have been upside down.
Stitching the cuff pieces together.
  • Next, place the lining pieces and the cuff right sides together and stitch, as shown below:
Attaching the lining in a Christmas Stocking.

Hint: Press the cuff seams toward the cuff on the front piece and away from the cuff on the back piece. This will allow your seams to nestle in opposite directions and reduce bulk.

  • Place the two pieces right sides together (nestle and pin those cuff seams) and stitch around the outer edges, leaving a 3" opening (for turning right side out) at the bottom of the lining 'foot'. To reduce bulk and allow smoother seams in the curves, clip almost to the stitching line in the inner and outer curves. Trimming the seam with pinking shears, as I did, will accomplish the same thing.
Stitch the stocking around the outer edges.
  • Turn right side out and press well. I cannot stress how easily the Point 2 Point Pressing tool makes the job a cinch. After turning, simply run the curved edge along the seam inside the stocking (through the opening at the lining bottom).
The Best Pressing Tool

After pressing well, sew the opening closed by machine. It will never show, no need to waste precious time hand sewing! Stuff the lining down inside the stocking. The cuff will extend above the stocking, simply fold it down over the outside of the top and press well. Attach a ribbon at the back seam for hanging. Give it to someone extra special!

Hello, Bear Christmas Stocking

Thanks for stopping by. Happy sewing and God bless! Maxie

Hello, Hello, Bear Embroidery Designs!

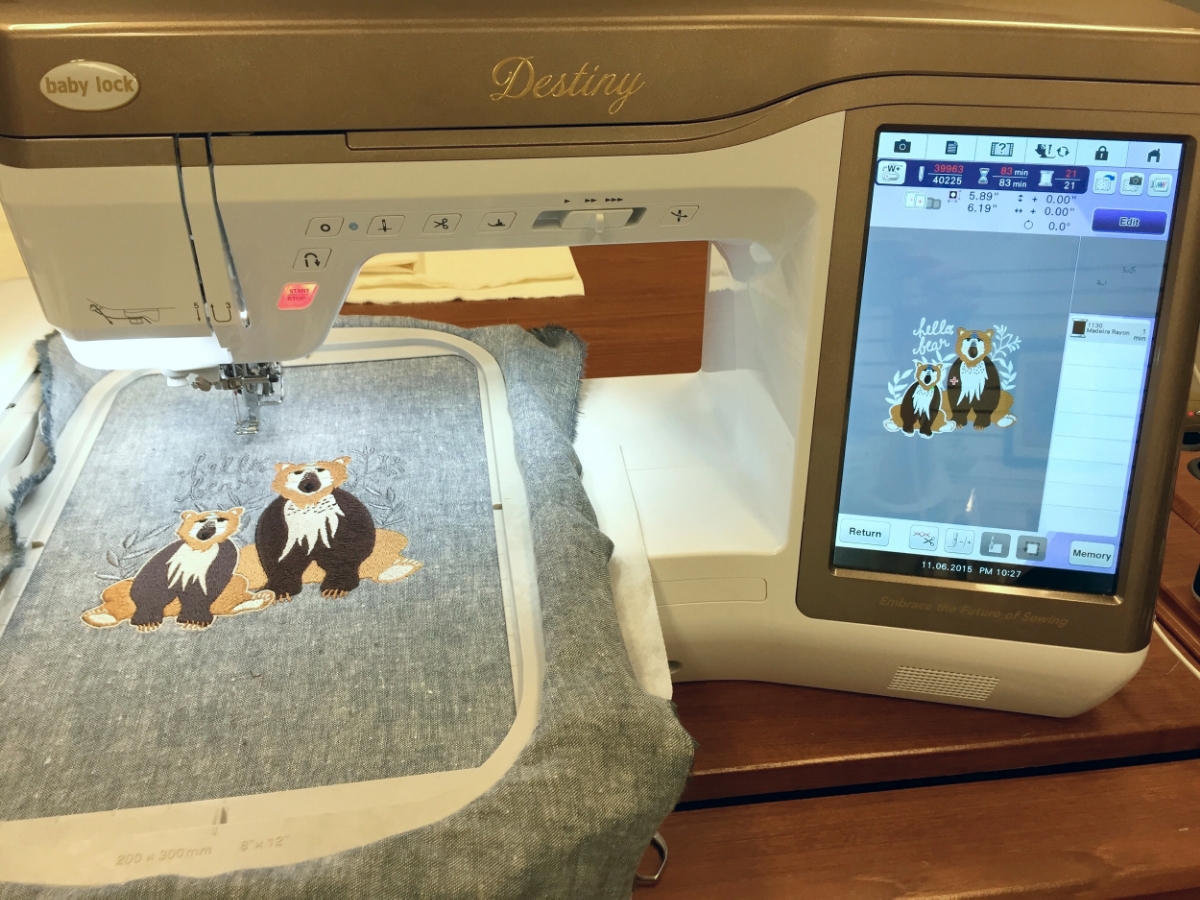
Did I need anything to make me love the Hello, Bear fabric line any more than I do? Aparently, there was more to love in the form of embroidery! AcuDesign, which is an app for your phone or tablet has contracted with Bonnie to offer designs from four of her fabric lines for Art Gallery Fabrics, including Succulence, Sweet as Honey, Cultivate and Hello, Bear! The app is easy to use and download designs in your needed format. My Baby Lock .pes and .dst formats were available, so I was all in!

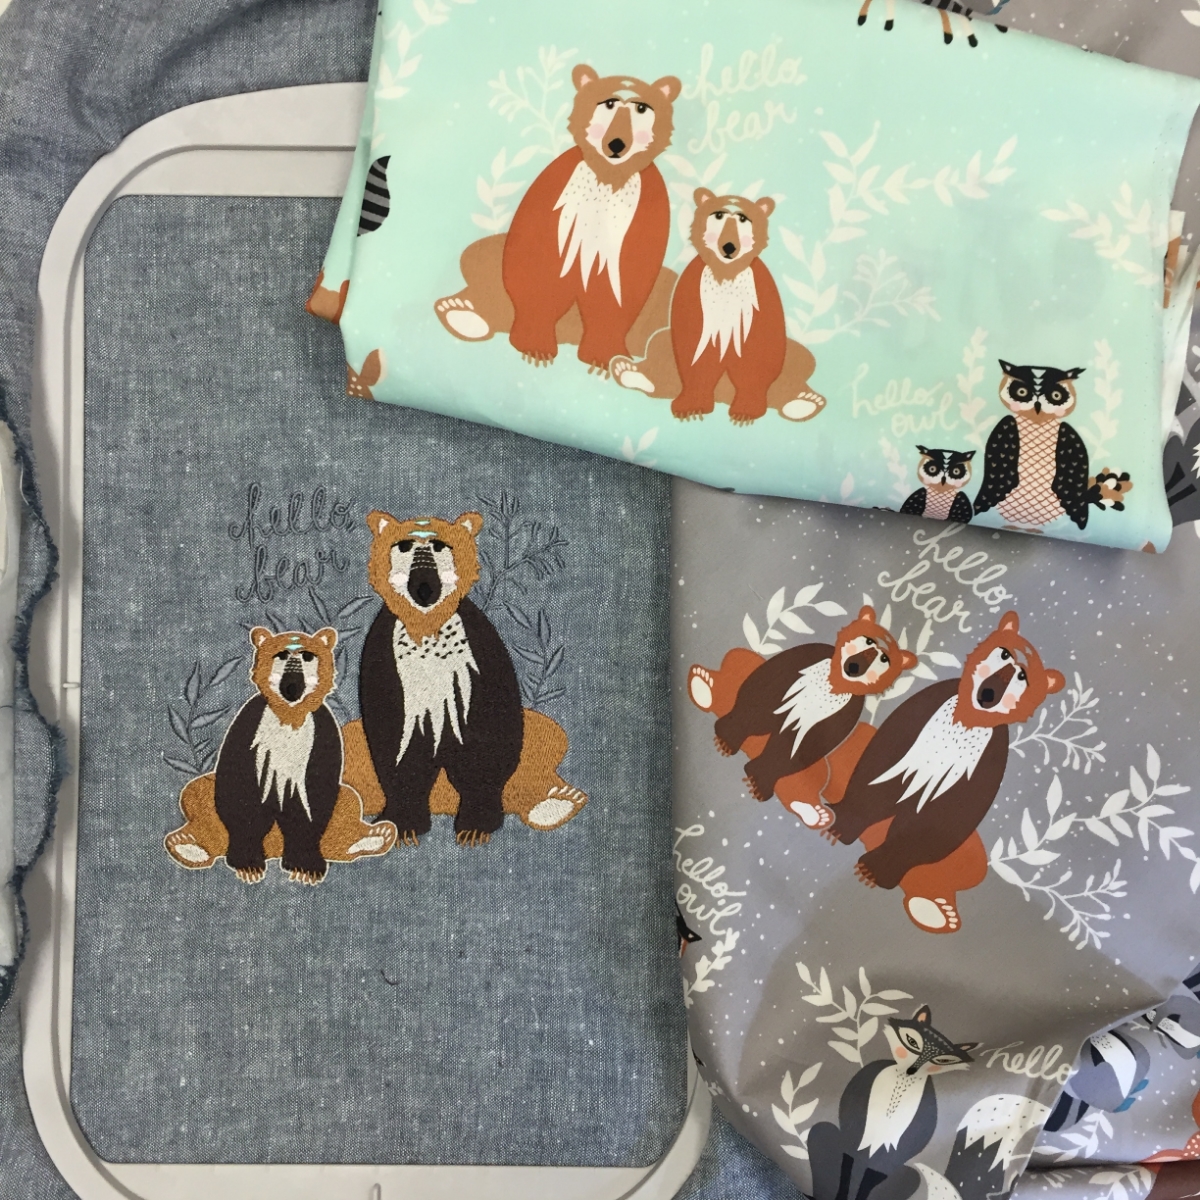
Hello, Bear Embroidery Design

This was my test run of the design and I think it turned out beautifully, so I'm on to some real projects with it now...with Christmas in mind! Look how it's perfectly true to the original design.

Hello, Bear Fabric by Bonnie Christine for Art Gallery Fabrics

My Baby Lock Destiny did a flawless job, as usual!

Baby Lock Destiny Embroidery Machine and Hello, Bear by Bonnie Christine

Maybe I'll be back here with my Christmas projects, soon!

Hello, Bear and my Baby Lock Destiny Sewing/Embroidery Machine

Thanks for visiting! Happy Sewing and God bless, Maxie