Reflecting on the Mirror Image

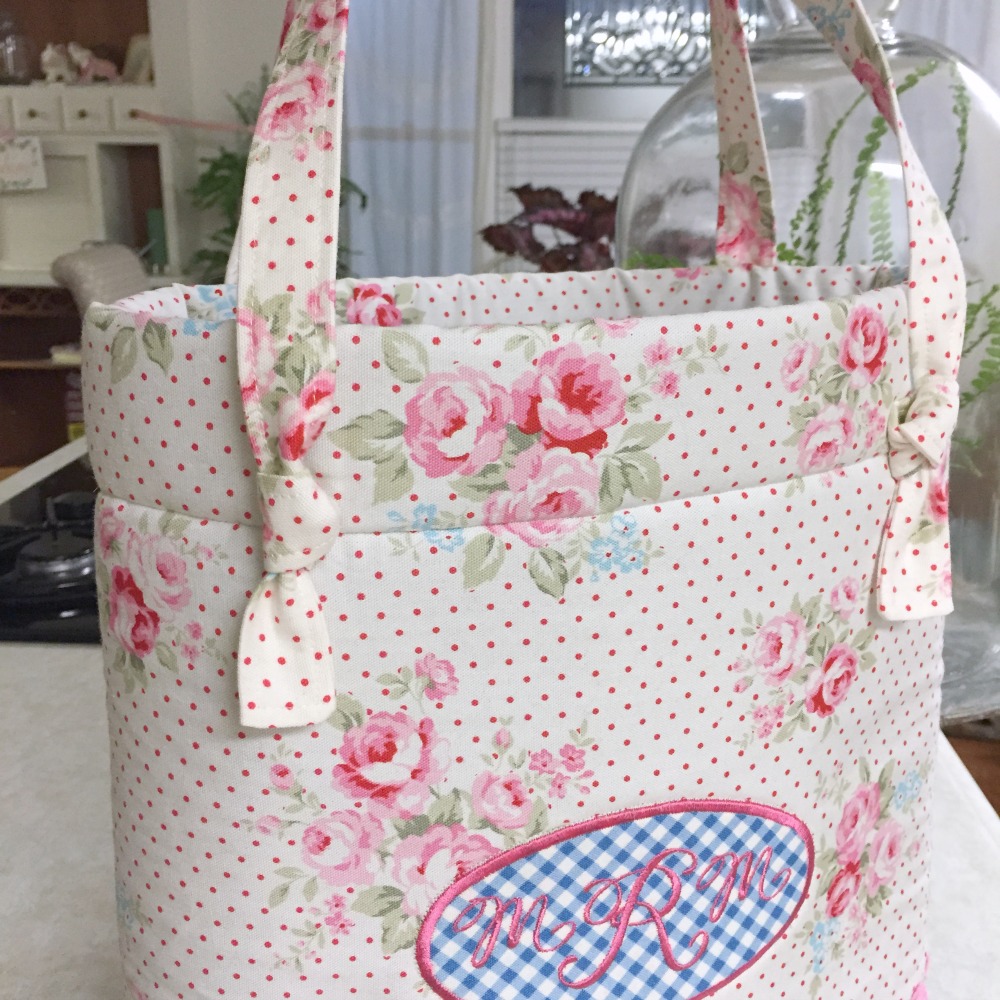
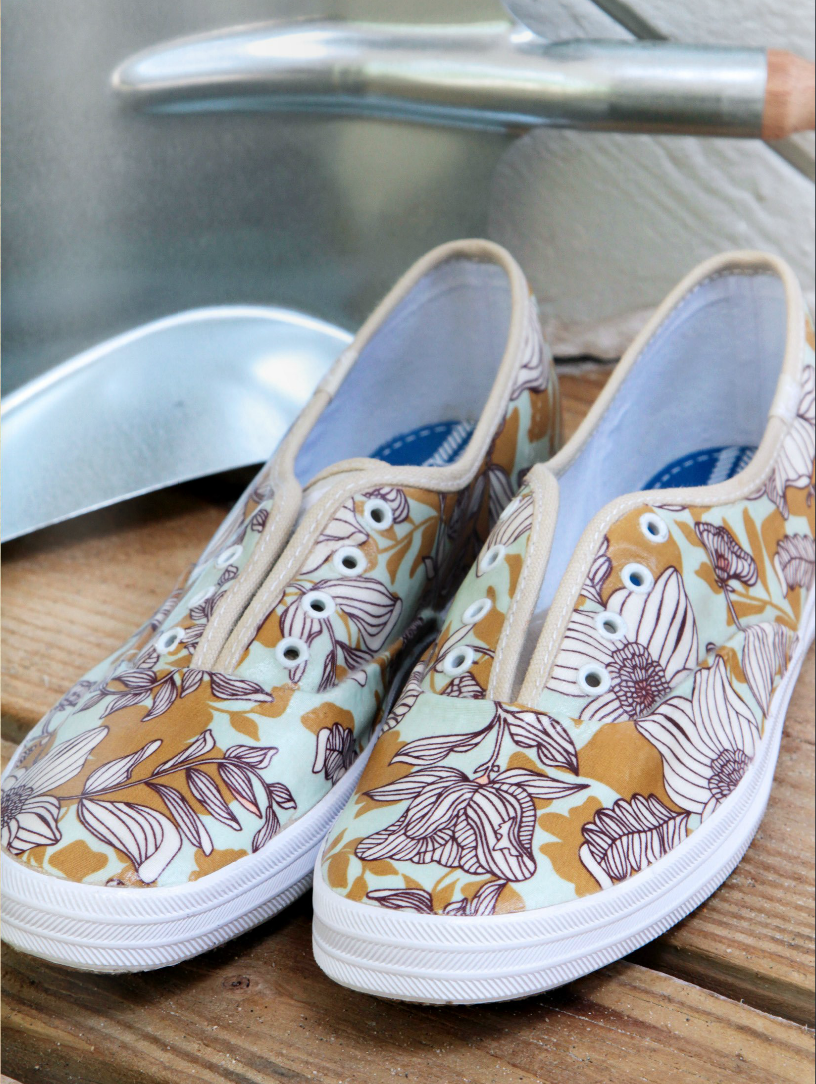
How often do you put to use some of those great features on your sewing machine? If you stick with me on a regular basis, I hope to help you begin to use a lot of your machine's special abilities that you might otherwise overlook. One great feature on most machines today is the mirror image. It's obviously needed for certain applications, such as when using the blanket stitch for applique´ and you just need the stitch's jump to work in the opposite direction for you. But what about a straight stitch? Could a mirror image be helpful for a straight stitch? Why, yes! I'll show you how I used it to make the sweet little bag shown in the photo below.

Bag is from Tilda's Summer Ideas, show above.

Bag is from Tilda's Summer Ideas, show above.

The mirror image feature does just what the name implies, flipping the stitch or design exactly opposite of the default setting. A scallop stitch that swoops to the right will swoop to the left when the mirror image is activated. That would be very helpful if you were stitching rows of decorative scallops down the front of a blouse and you wanted all the rows to the right of the center line to lay exactly opposite of the rows to the left of the center line. Janice Ferguson Sews has a great picture on her blog of decorative stitches that have been mirrored on the front of a garment. The need to mirror certain stitches is obvious, but let's look at mirroring a straight stitch. Here is the mirror image on the Baby Lock:

Baby Lock's Mirror Image Function

When I sew a ribbon on a piece of fabric, I like to stitch both sides in the same direction so that the fabric is not skewed. When stitching straight lines some people stitch one line in one direction and the second in the opposite direction, continually alternating sewing directions to 'even out' the layers. I can usually spot when this is done, because the fabric will slightly skew between the rows of stitching.

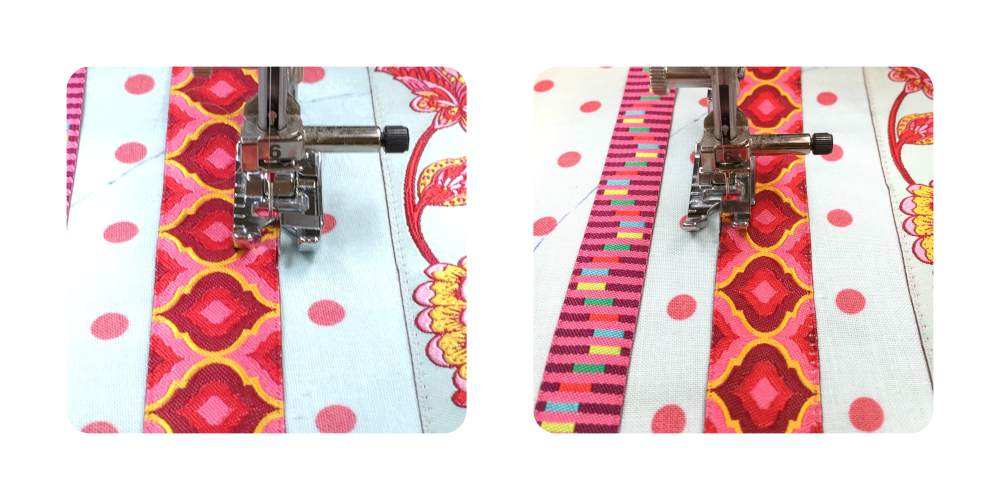
For this project, I used the Edge Joining Foot to stitch along the edge of the ribbon. I set my needle in the position that I wanted, and sewed down one edge (left photo, below). Rather than turn my project and change stitching directions for the other side, I simply touch my mirror image button and slip my fabric over until the other edge of the ribbon is positioned underneath the needle (right photo).  Because this foot has a centered metal 'fence' guide, placing the ribbon's edge along the fence assures perfectly aligned stitches! Moving the project and realigning it under the presser foot as before will ensure that both stitching lines will be the same distance from the ribbon's edge, and that no skewing will occur.

Using the mirror image function with a straight stitch.

Yes, the mirror image works great with your straight stitch when you need to use both sides of the presser foot to guide your stitching lines, both sewn in the same direction! Try it for purse handles, too. Can you share how the mirror image function has helped you?

Thanks for visiting! Happy Sewing and God bless, Maxie


Put Your Best Foot Forward!

When we sew, sometimes using the right tool can mean the difference between homemade and handmade. I prefer handmade, but I'm no stranger to homemade! I've been sewing for a long time and I've paid my homemade dues, and that's one reason why I love to share things that make our sewing easier and, at the same time, offer a more professional finish. Today I want to share one of my very favorite and most useful presser feet, the Edge Joining Foot. This foot isn't likely in your accessory box because it is usually an option. Looking a bit like the blind hem foot, you might inadvertently think you have it, but upon inspection you'll notice the difference. Below is a shot of my foot as I sew in the ditch (seam) of this placket on a robe I made for my mother. With a small needle and a 60 wt. cotton thread, the stitching is virtually invisible. Show off!

Using the Edge Stitching Foot.

Pictured below are both the blind hem foot (left) and the Edge Joining Foot (right). Notice that the blind hem foot's center guide has a curve in it that wraps around the needle. The center guide on the Edge Joining Foot doesn't even extend into the needle area, allowing the needle to sew at any position you choose. Keeping your needle in the center position, as in the picture above, allows you to stitch perfectly in the ditch because the blade will guide your fabric. If you want to stitch on either side of the ditch, just move your needle into a right or left position. The blade will still remain in the ditch, but the needle will impeccably stitch the perfect distance from the ditch! Show off!

I use the Edge Joining Foot to sew many of my quilt bindings. The blade keeps your stitching line uniform on the binding's folded edge. You can see all four edges of this quilt's binding in the photo below (two sides show the front and two show the back). Show off!

Machine Sewn Quilt Binding with the Edge Sewing Foot

There is so much more that this little jewel of a foot can do for you, making you look like the best sewist ever!

  • Sewing edges of laces, trims or ribbons together.
  • Topstitching any edge (bindings, purse handles, etc.)
  • Sewing pockets into totes or clothing.
  • Sewing applique´edges in place.
  • Fagotting two folded edges together with a decorative stitch.
  • And more!

Do you have your Edge Joining Foot yet? Let's get out there and show off!

Thanks for visiting! Happy Sewing and God bless! Maxie


Easy to Sew Bag Handles

I made another bag...and this one is for me! I made sure of that by embroidering my monogram on it so that one of my daughters couldn't 'call' it. (I'm not sure where that started, but if they want something of mine, they think that the first one who 'calls' it gets it.) Since their initials are different from mine, this bag is safe in my arms! Today I want to share a new way of making handles...the way they attach might surprise you, and I have an embroidery tip for you!

The Perfect Whatever Bag by Maxie Makes and Bonnie Christine

The pattern is the Perfect Whatever Bag, designed by my daughter, Bonnie Christine and me. I've posted in the past about this free, downloadable pattern, but today called for another post because of the new variations. This bag pattern is so versatile. If you make it, please send me a picture of your version! I used a canvas border print (I yard, 60" wide) for both the inside and outside of the bag, flipping the lining so that the blue check was at the top inside of the bag. See the pattern for cutting measurements and instructions.

Cutting the fabric for the bag.

I decided to monogram the bag with an applique´ made from the leftover scrap of blue check fabric. It fit just perfectly! I monogrammed a sample first, and discovered that the tearaway stabilizer made a perfect template for placement of the final monogram. I simply creased the center of the fabric and stabilizer and placed the creases together to find the exact center.

Marking the embroidery placement for the bag front.

I love my Baby Lock machine...      Love the font? I found it here.

The Baby Lock Destiny makes it easy to design your own monograms! This monogram is applique´d with a simple oval frame surrounding a fancy font for an elegant look.

And I just had to sew a little ric rac trim on, right? Pink, please.

Sewing the ric rac trim on The Perfect Whatever Bag.

So, from here on out you'll just follow the instructions in the aforementioned free downloadable pattern. Except for the handles. Since I didn't have any leather pre-made handles on hand, I would have to make them. I wanted a very fast and easy way to make and attach them, too, because my Saturday was running out. This method sort of just happened without a master plan, and I loved them in the end!

The Perfect Whatever Bag Handles.

To make the handles:

  1. Cut two 2 1/2" x 27" strips.
  2. Fuse a lightweight stabilizer on the wrong side.
  3. Sew them into a tube, sewing the ends closed and leaving a 2" opening along the center area for turning. 
  4. Turn each end right side out through the center opening. I used a tube turner for this step.
  5. Press well and topstitch around all the edges, stitching the opening closed.
  6. Measuring 3" in from each side of the bag and about 1.5" down from the top, make a mark for placement.
  7. Pin the handles in place as shown in the photo below. Stitch from top to bottom, as indicated by the black arrows. I stitched twice to reinforce the handle attachment.
  8. Tie the end of the strap in a half knot by holding the strap up in the center and wrapping the short end over, around and down through the loop. Pull snugly to form a knot.
handleplacement.jpg

9. Love it! Sturdy handles, easy and fast. Saturday even still has some daylight left.

Knotted bag handles on The Perfect Whatever Bag.

Thanks for visiting today! Happy Sewing and God bless! Maxie


The Silhouette Cameo Cutter, Paper Succulents and Miss Mossy

You probably know that I own a quilt shop in Franklin, NC, A Stitch in Time. (You'll find a free quilt pattern below!) Recently, Andrea, one of my employees, challenged the whole staff to each create a unique display for the shop. Great! Oh wait, did that include me? Of course it did. The instigator is just about finished with her display, so I went into a flurry to get mine in readiness before our deadline of July 17 (when our Carolina Shop Hop officially begins!).

Bonnie and I had covered one of my mannikins with moss for a quilt market display, and she was standing idle in the shop. We affectionately call her "Miss Mossy". Hmmmm. For the most recent quilt market, we had cut paper succulent flowers with the amazing Silhouette Cameo Cutter. Most of them made it back home safely, but I could cut a few more. Let's see what we can do...

Moss Covered Mannikin

The Silhouette Cameo Cutter will cut just about anything! Quilters use it to cut fabric shapes and paper templates. It also cuts adhesive vinyl. Have you noticed "This Place is Sew Pieceful" on the wall in my sewing studio videos? I cut them and easily applied them to the wall! For the flowers on my mannikin, I used various weights of card stock. See the steps below: 1. Cut; 2. Shape the petals (I just rolled the ends of each petal on a pencil); 3. Glue petals together with a glue gun; 4. Take a picture of your beautiful flower!

Making a flower on the Silhouette Cameo Cutter.

Now, adorn something with it! Here's my display for our challenge. (Notice the Keds from last week's post! And the Book Mobiles? I'll save those for next week's post!

Quilt Shop Window Display

If you like the quilt pictured above, the pattern (designed by Bonnie and me) is offered as Art Gallery's free, downloadable pattern for Bonnie's fabric line, Cultivate! Click the image below and you'll be taken to the pattern on Art Gallery's website.

Sucullent plance for Bonnie Christine's Succulance Fabric line for Art Gallery Fabrics.

And here's a little hint of what you'll see in Bonnie's next line...which should arrive any day now!

Thanks for visiting! Happy Sewing and God bless! Maxie

Amp Up the Keds with Beautiful Fabric!

When Art Gallery Fabrics posted a picture of Keds that had been covered in Bonnie Christine's Cultivate fabrics, requests came in for a tutorial. The shoes in question were made as a display for Bonnie's booth at International Quilt Market, by yours truly! I'm happy to share the process with you today, and I think you'll find it surprisingly easy! Note: because Art Gallery fabrics are printed on fine pima cotton with a high thread count, they work great for this (every!) project.

Photo by Art Gallery Fabrics

Photo by Art Gallery Fabrics

Supplies:

  • Keds or similar canvas shoes
  • Beautiful fabric...I suggest any of Bonnie Christine's fabrics for Art Gallery!
  •  Mod Podge, available online or in craft stores. I used the regular matt formula.
  • Sponge brush
  • Exacto Knife
  • Sharp awl
  • Transparent paper for creating a pattern. I used pattern tracing paper, available at sewing stores.
  • Pencil & scissors

Visually divide the shoe into segments. Keds are easy to divide because the pieces that were sewn together to make the shoe overlap and are obvious. Using pattern tracing paper, or similar transparent paper (interfacing or stabilizer would work well, too), make a pattern piece for each segment by pressing the paper next to the segment you are working on and tracing around the edges. The style shoe I used required 3 pattern pieces: a left side, a right side, and a toe. The shoe's center seam in the back was sewn flat, so I let the pattern pieces overlap at that seam 1/8". Let your pencil trace just inside the raised edges and to the sole edges. Cut the shape out of the paper, just outside (about 1/8") of the drawn lines. You want this pattern to be over sized a bit so that you can trim the fabric to fit the shoe.

Use the pattern pieces to cut the shapes out of the fabric you've chosen to cover the shoe.
Beginning with the left or right side, use the sponge brush to put a coat of Mod Podge over the canvas area to be covered. Only cover the area you're working with, and go sparingly here, you want it to be very smooth.

Press the fabric over the shoe, smoothing it with your finger or a the back of a spoon. While the Mod Podge is still wet, fit the piece of fabric to the area by trimming exactly up to the raised seam, the binding trim around the top, and to the edge of the rubber sole. Remember to let the two side pieces overlap each other about 1/8" at the center back seam. To cover this overlap, I folded a 1" strip of fabric into thirds, hiding the raw edges, and glued it in place with Mod Podge. Carefully trim around the shoelace eyes with the exacto knife.

Photo by MaxieMakes

Photo by MaxieMakes

Cover the toe area last. Your piece should go up and over the raised seam and overlap the side piece just a little. Use the exacto knife to trim to the side fabric. The knife can push just the edge of the fabric underneath that raised seam and it will look very smooth. Don't worry if you see a raw edge because the Mod Podge will cover it and make it all smooth.

Photo by MaxieMakes

Photo by MaxieMakes

Let the shoe dry completely. Sand it with a fine grit sandpaper and coat the fabric pieces with another smooth layer of mod podge. Let dry and sand again. If desired, coat one more time.

                 Photo by Art Gallery Fabrics

                 Photo by Art Gallery Fabrics

Now, put on your shoes and go to town! Thanks for visiting! Happy sewing and God bless, Maxie.